 Cassandra.org
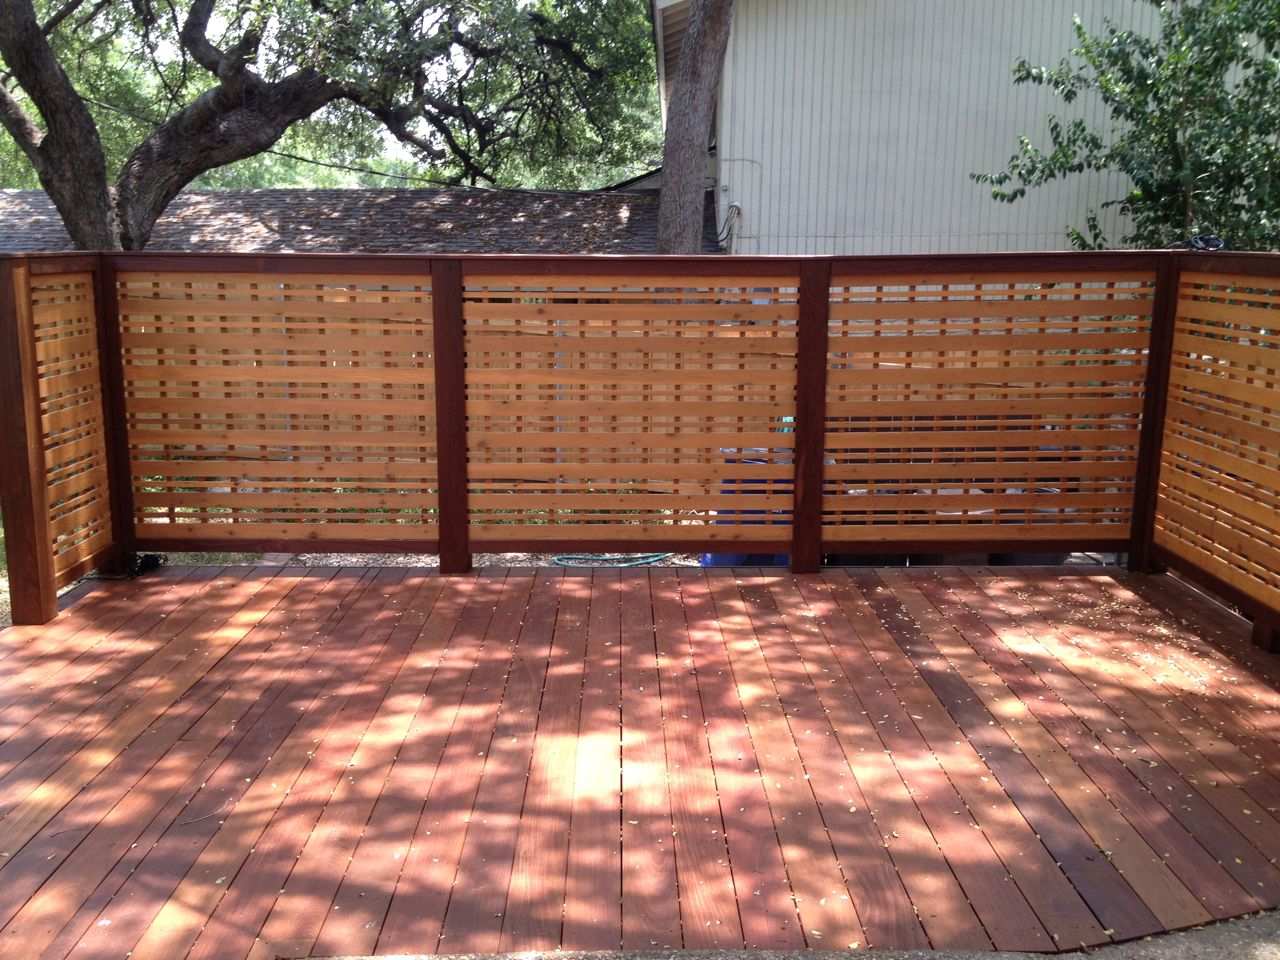
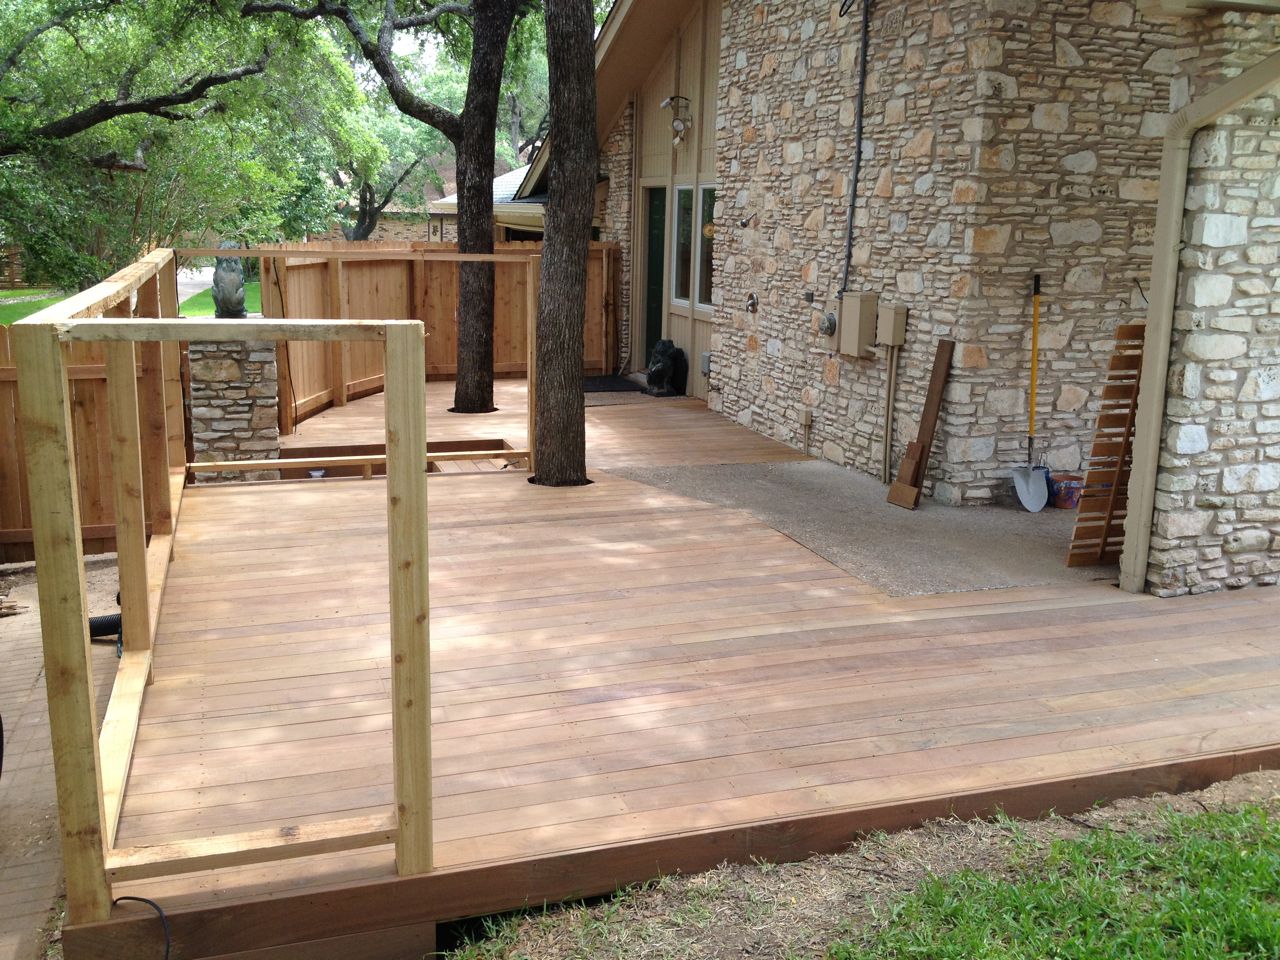
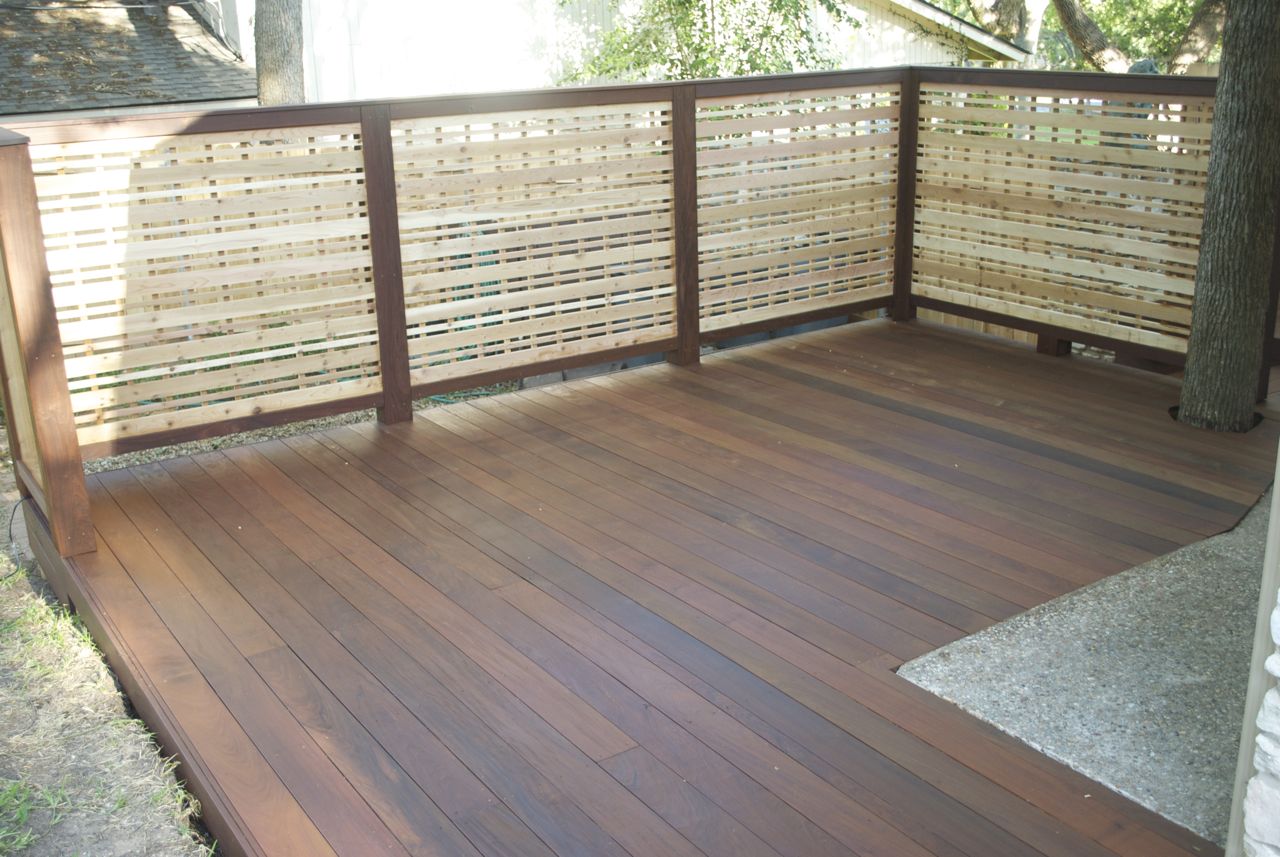
Finished deck screen - east view

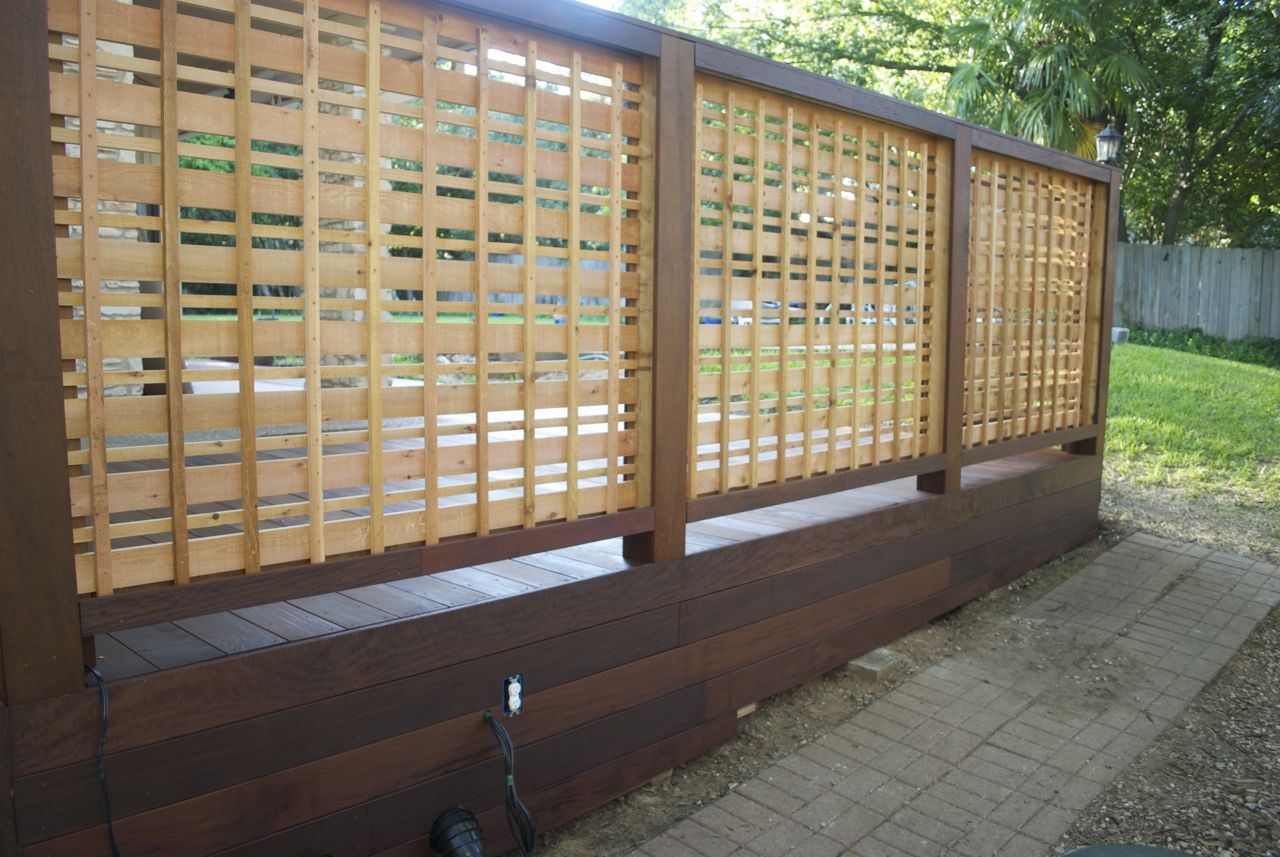
Finished deck screen - north view
Story

Model Rendering Birdseye View

Model Rendering Rear View
As I was working on the designs and features for the New Decks Project, I found a
general design I liked for a lattice-like wall. The previous deck had
a mostly solid wall around it due to the fact that there was a hot tub
there, which I assume the previous owners did for privacy reasons.
With the hot tub gone, and with some other fence height changes, the
need for a solid wall was diminished. The solid wall made things feel
a little too closed in, so I went for a lattice work design to
provide some visual separation and a little privacy, but not so
militantly dividing the deck area from the rest of the yard.
I now call this the "deck screen", borrowing from Frank Lloyd Wright's
use of the phrase "light screen" for his leaded glass windows. Though
there is no glass in my deck screen, the purpose was identical: providing
visual separation without completely blocking the light/view. Putting
just a little bit of leaded/stained glass in a window creates a
surprisingly effective visual separation from the outside.
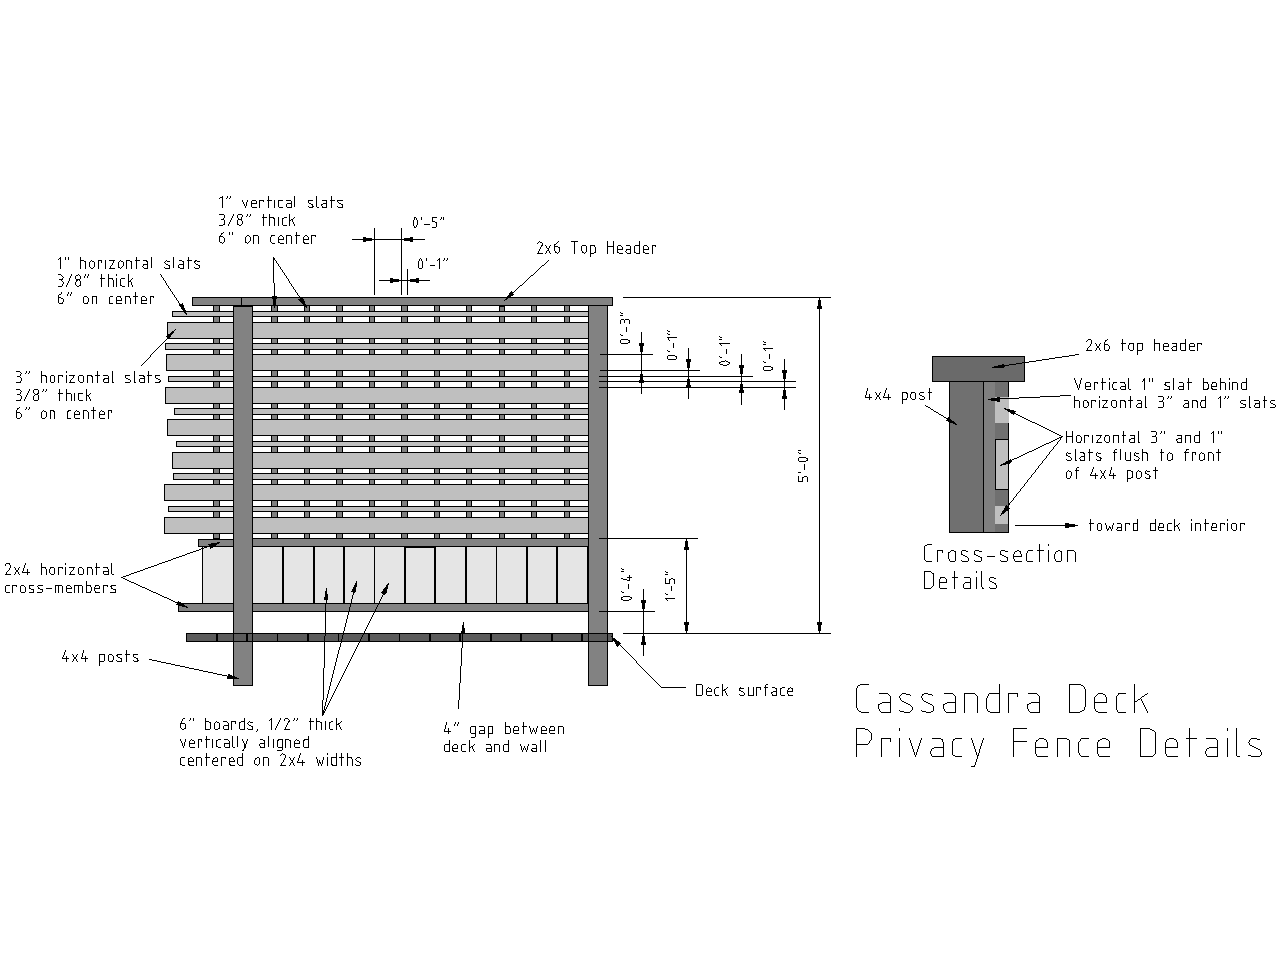
Detailed Blueprint
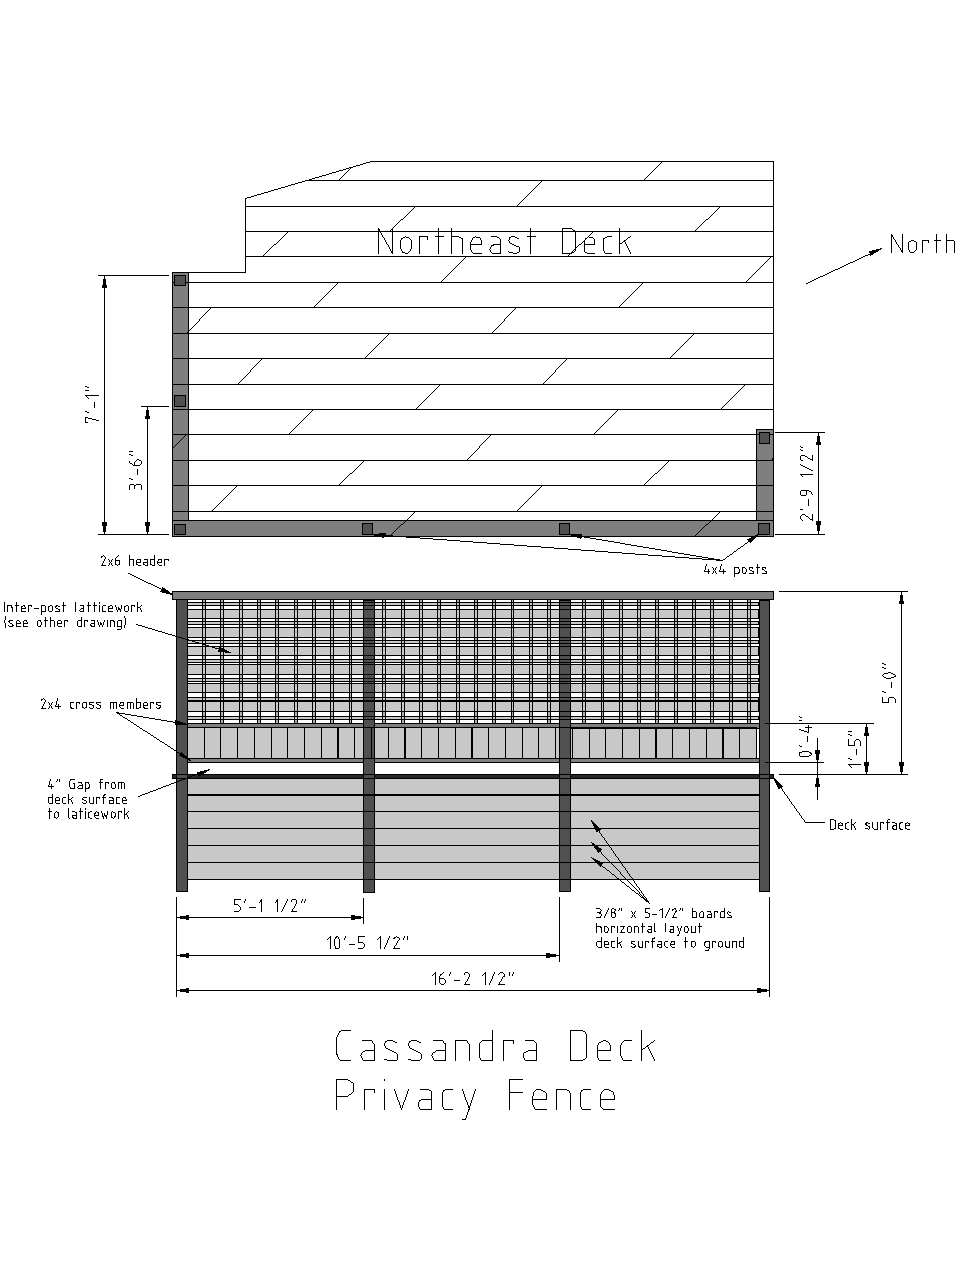
Location and Sizing Blueprint
The deck screen was part of the original blueprints I gave to the
contractor for building the New
Decks. However, because it was fairly detailed and precise, the
contractor asked whether I might want to build this as he would need to
contract to a "trim guy", who charges a lot of money. This was actually
the best case scenario for me. I was only including it in the contract
work because I thought it might be too complicated for him to coordinate
doing some pieces while I did other pieces. I actually wanted to make it
myself and designed it specically to be a good balance of being nice
visually, but simple to build. Turns out it was fine with him if I did
the work. Thus, I had the carpenters that were building the deck merely
install a few 4x4s and 2x4 as the structural skeleton, and when they were
done, I added the trim work and lattice work.
The original design had a lower section of vertical slats, but since
the Deck Furniture was mostly
going to be covering the lower portion of the deck screen, this seemed
like and unecessary extra complication, so I decided to make it
uniformly the same from top to bottom.
Details
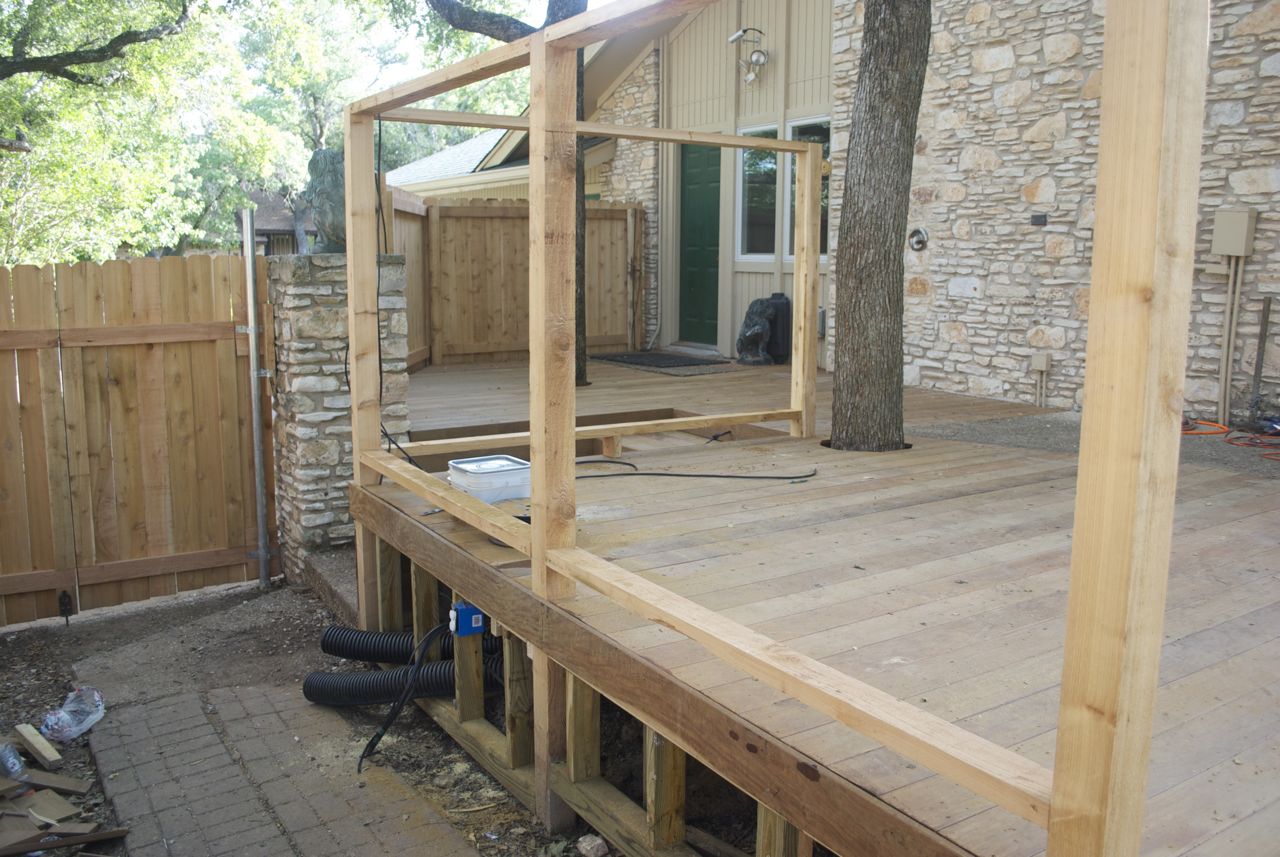
Deck Screen Frame
Deck Screen Frame

Deck Screen Frame
The contractors that built the deck just left a frame for me to add the
deck screen to. The frame was six 4x4 vertical posts with 2x4 cross
members mounted flush to the posts. One span between the posts was too
long (7 feet) and they needed to add a support in the middle. My
orginal plan called for an extra post, but I did not catch it in time
and it would have been a lot of extra work to add it by the time I
noticed. The pictures above are what the frame looked like before I
began my work on it.
An important design feature is the 4 inch gap between the deck surface
and the beginning of the deck screen. With the previous wall, which went
all the way down to the deck surface, debris removal was a problem. This
was especially true trying to use a leaf blower. With the corners,
blowing the leaves would result in a cyclone of leaves, mostly falling
back down onto the place where they started. With the added gap, we can
just blow or sweep leaves and debris off the deck into the yard area.
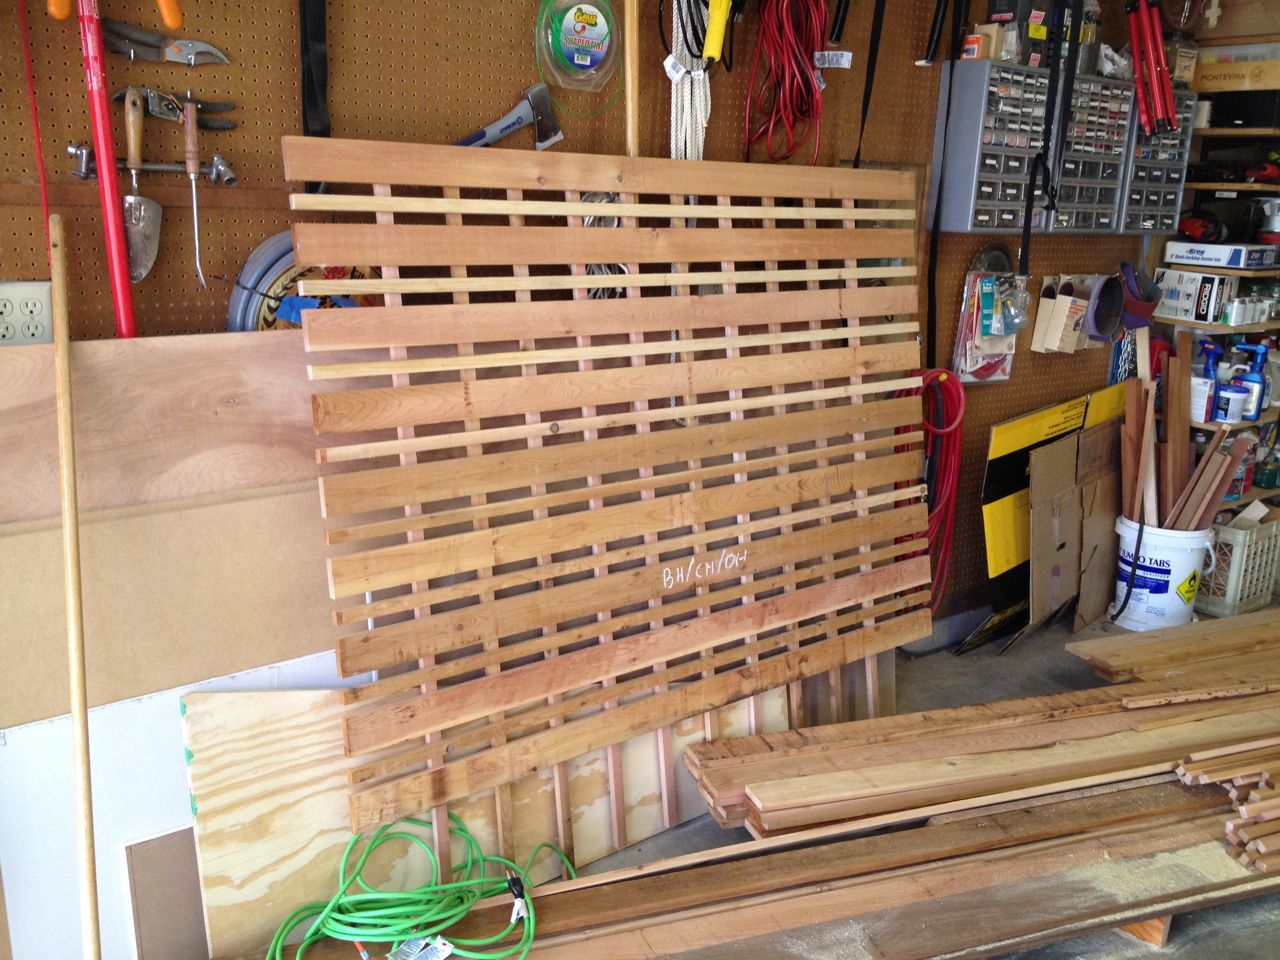
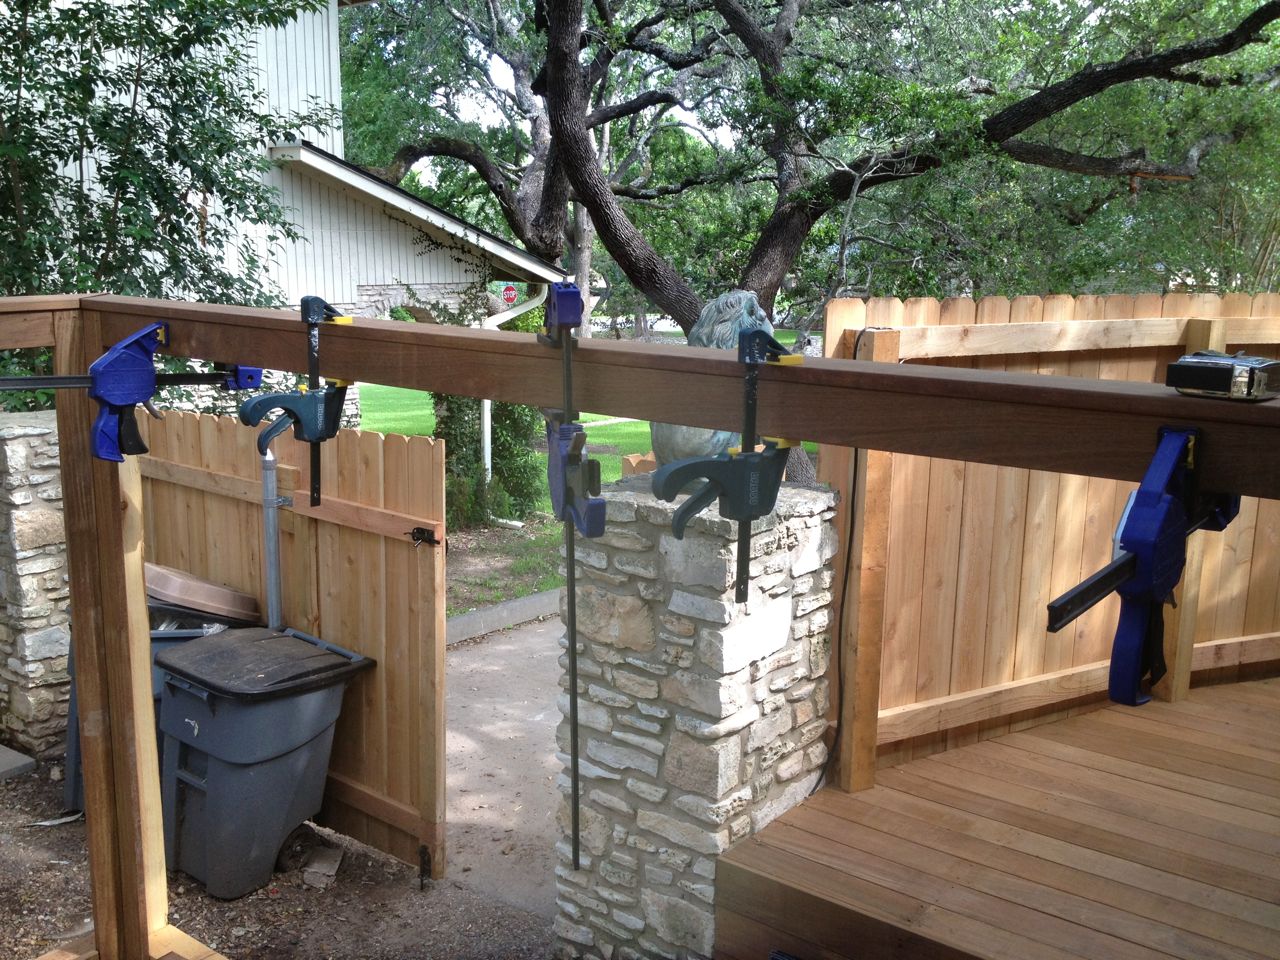
First Full Assembly
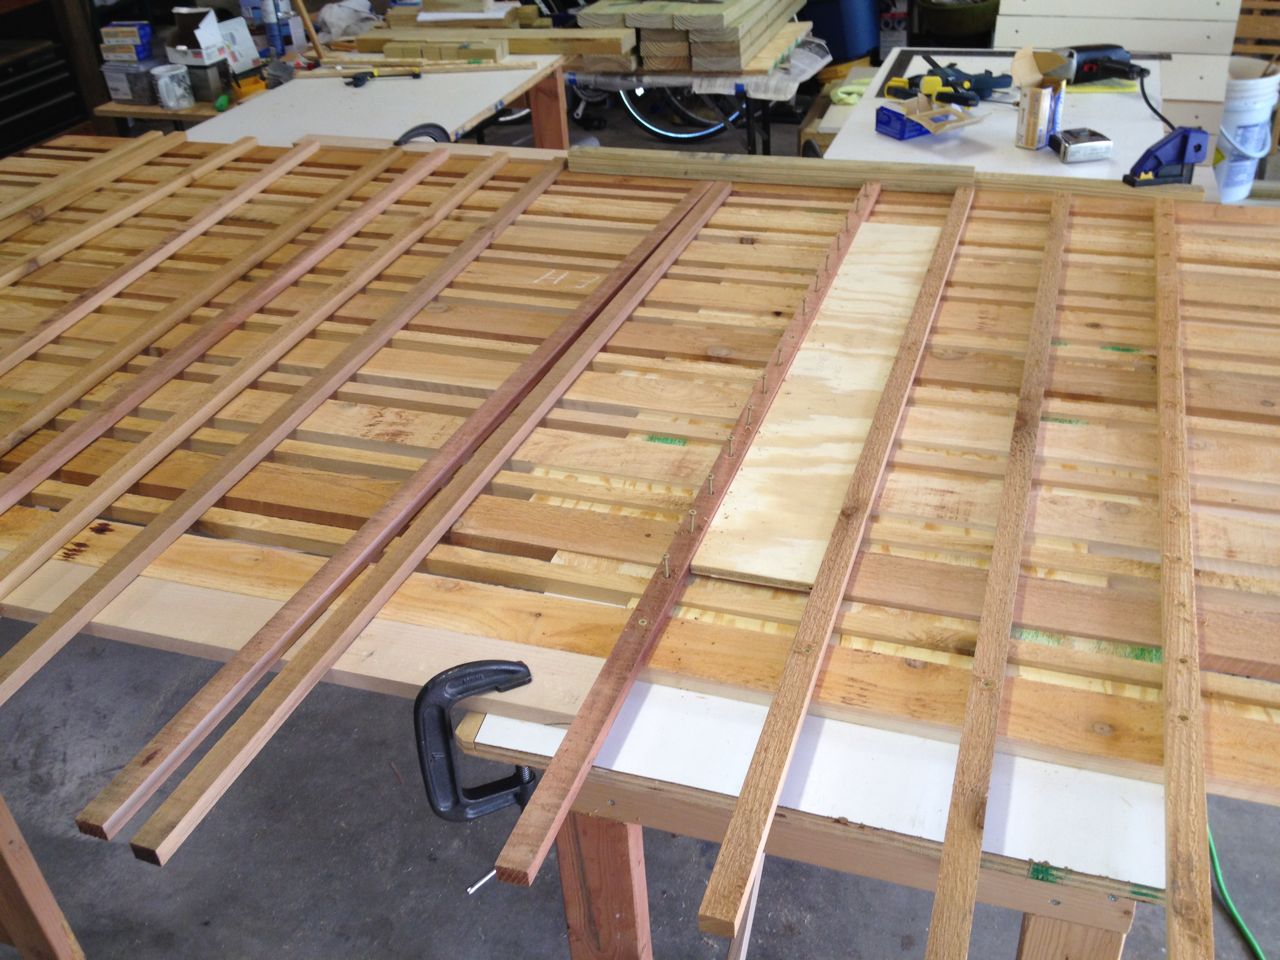
Assembly in Progress
I had begun building the deck screen in my garage before the deck was
finished and before the frame structure of this was even up. I had
rough dimensions of how high and wide they would be, but could not
commit to the final dimensions until the carpenters had finished their
work. Thus, I made them oversized, and would trim them to their final
size with a circular saw once the deck was completed. Each night when
the contractors finished, I would measure the dimensions to ensure that
everything was tracking to the sizes I was expecting.
Final cutting and installation would reveal that one of the 4x4 posts
for the deck screen was fairly non-square. This turned out to be less
of a hassle than it usually is to compensate for uneven structures.
Thus, one of the deck screens is really trapezoidal shaped, though you
have to look very closely to notice it. The 7 foot wide section of
deck screen probably should have been two 3.5 foot sections with an
extra 4x4 post in the middle. It was challenging to assembly and
manuever the 7 foot section around the garage.
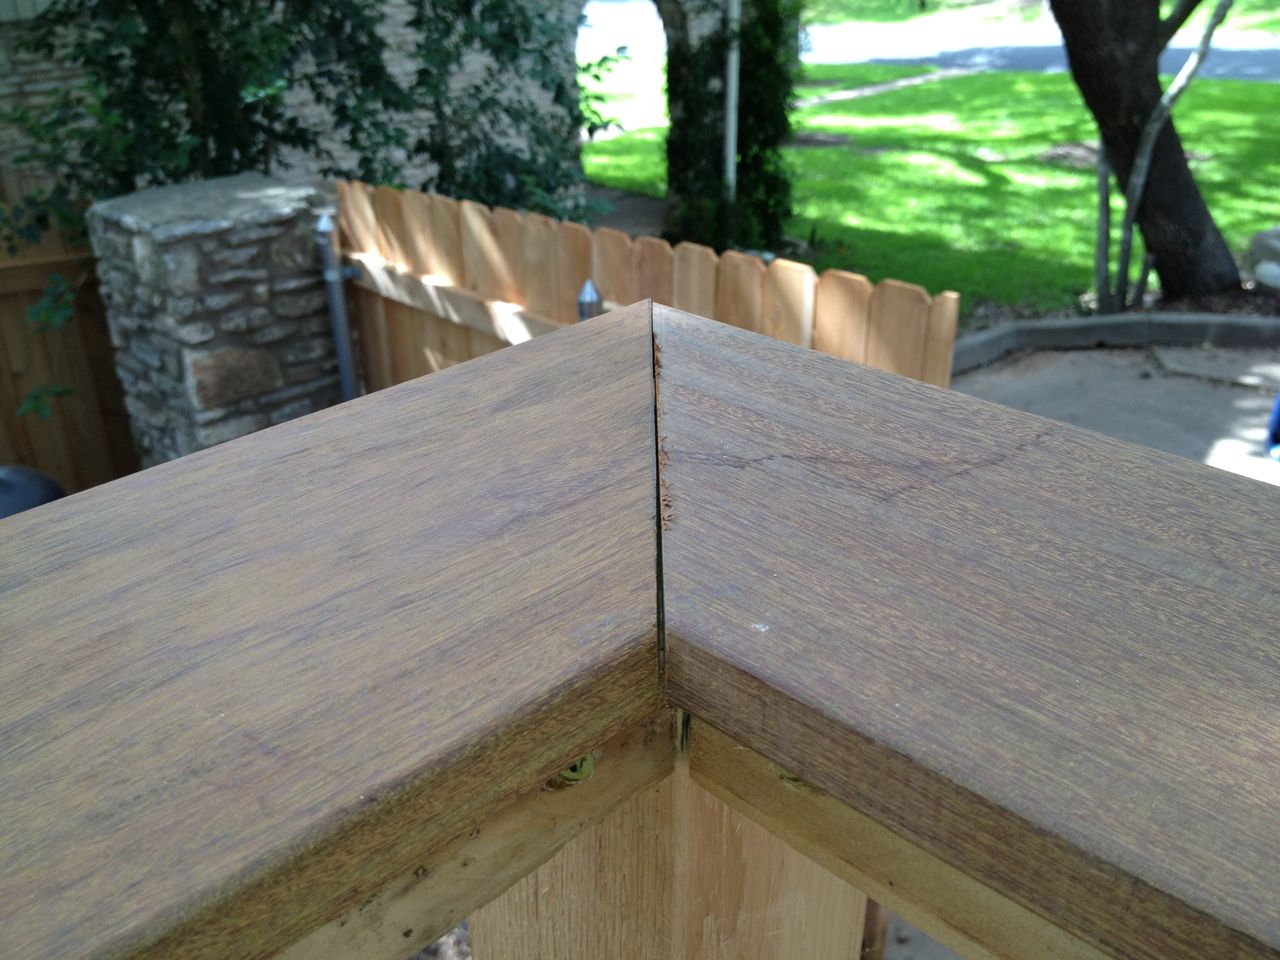
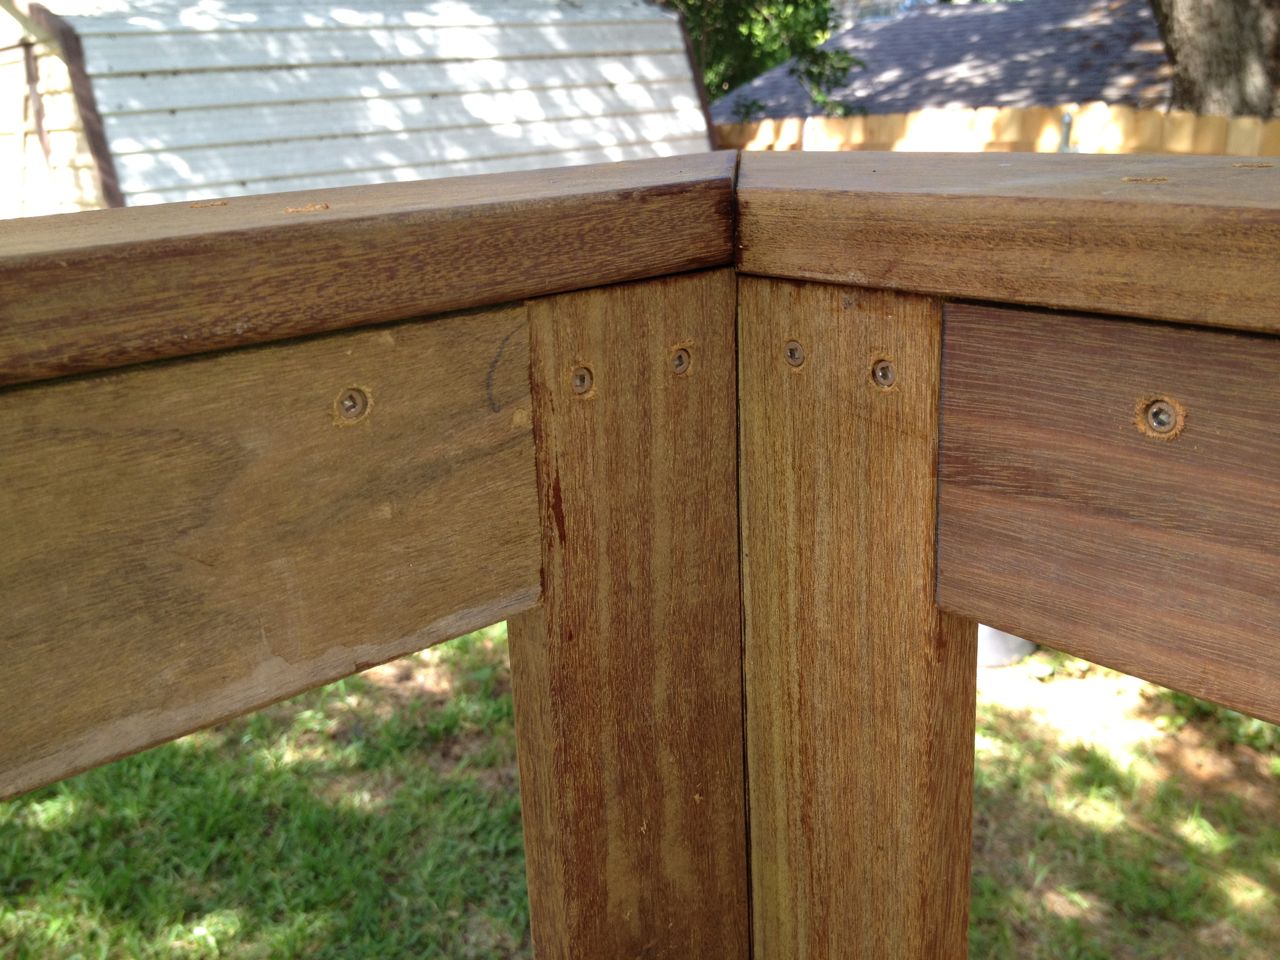
Closeup of Mitered Corner

Closeup of End Post
The trim for the deck screen was done with Ipe wood, which is the same as
the deck material. A lot of this I was able to grab from the scrap heap
after the carpenters were done with the deck planking. The lattice part
was done with 1x4 cedar planks (one side finished). I ripped some of this
into 3 inch strips and some of it into 1 inch strips. The horizontal
pieces are alternating 1 inch and 3 inch pieces, while the vertical
pieces are 1 inch pieces. I used special tan deck screws to hold it all
together. The cedar wood I used, though finished on one side, was not of
uniform quality, so I had a little more waste than I expected, and had to
sand the front side surfaces to both smooth it out and clean it up from
other surface blemishes.
Finished Inner Corner
Assembly of Trim
The Ipe wood trim work was not really part of the design and was a very
late addition. I had wanted everything to be Ipe, including the deck
screen, but a 4x4 piece of Ipe wood is hard to come by, and also very,
very pricey. I did see some mention of just using deck boards to add a
facade to the 4x4, so I had that in the back of my mind. What really
made it all come together as a solution was trying to work out a clean
way to install the deck screen, given there were not good surfaces to
directly screw into. By installing the Ipe trim work, this gave me a
simple and visually appealing way to adhere the deck screens to the
structure. Figuring out how to mount these without adding too much
complexity or ugliness was the most difficult design problem and I did
not actually decide on this until after the deck screens and frame were
finished. The end result was simple, but there were a few more
complicated designs for affixing the deck screen that preceeded this
that I was never quite happy with.
After 3 Screens Installed
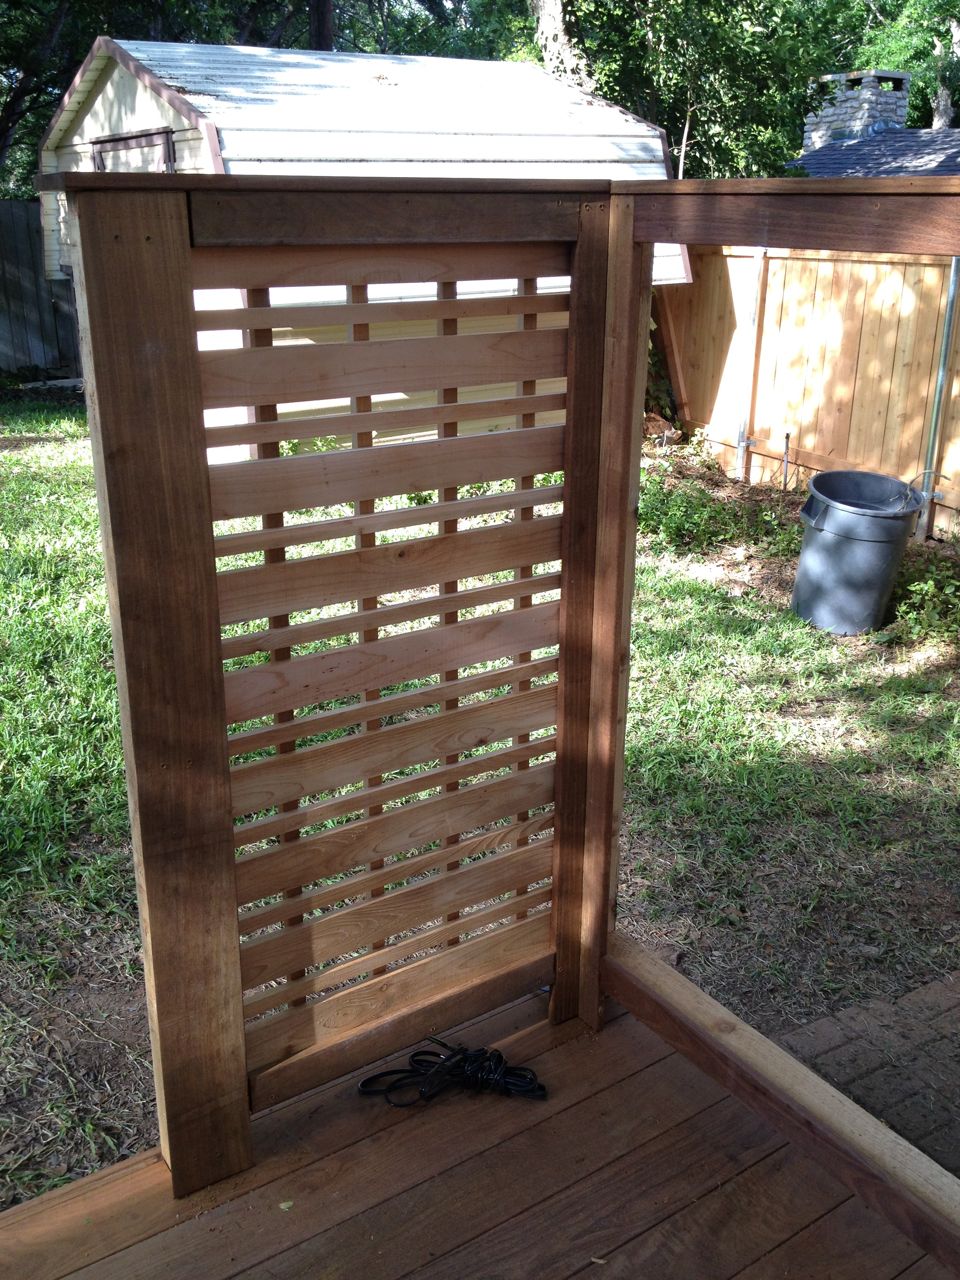
First Screen Installed
I had to first install the front trim pieces, then the deck screen
lattice work, and then finally the rear trim. The front trim is what
the screen would screw into by just sliding it in the back side and
screwing around the edges. The rear trim would make the opening
smaller, so had to be done afterwards.

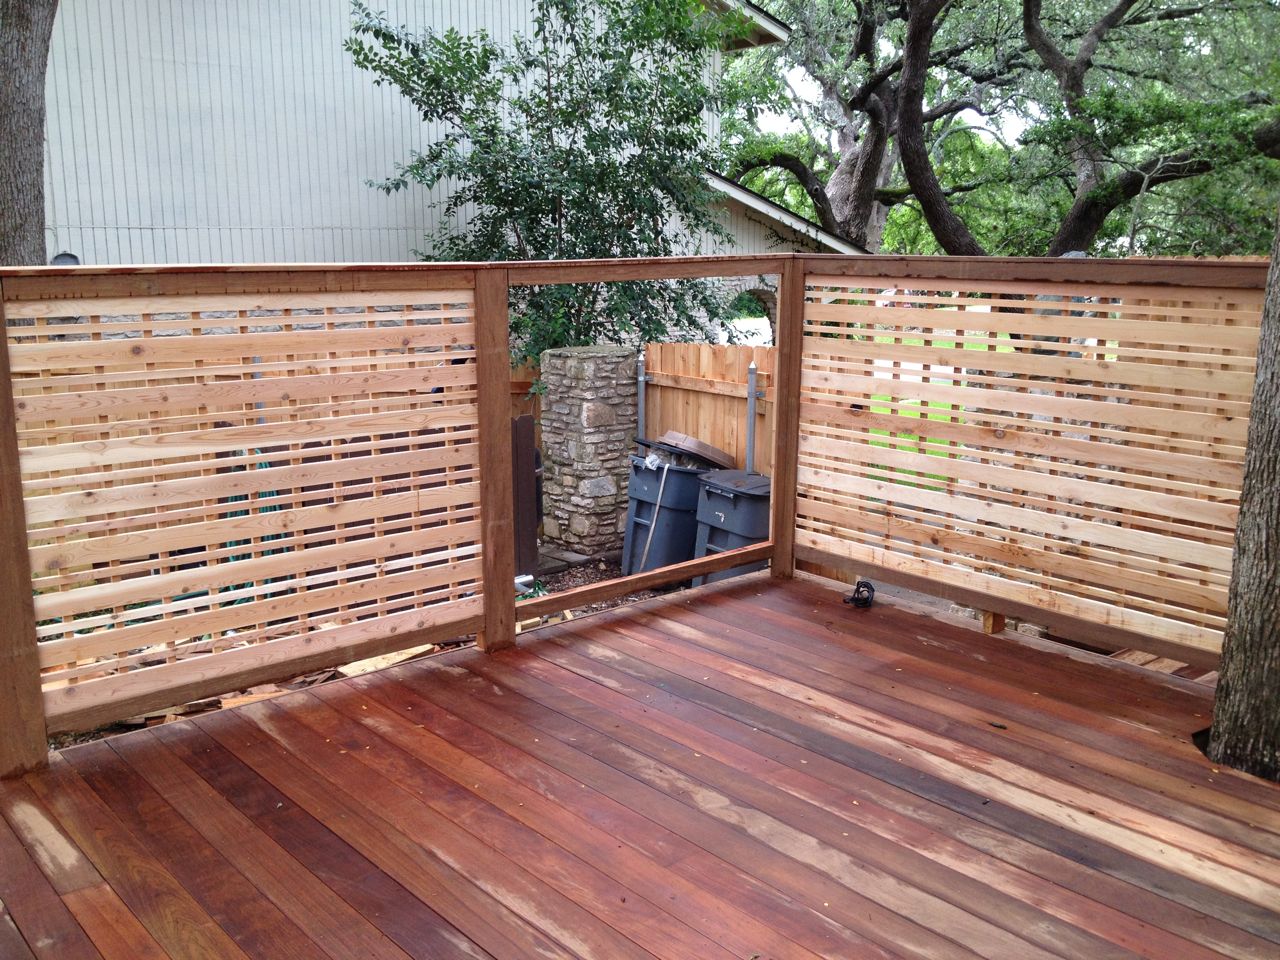
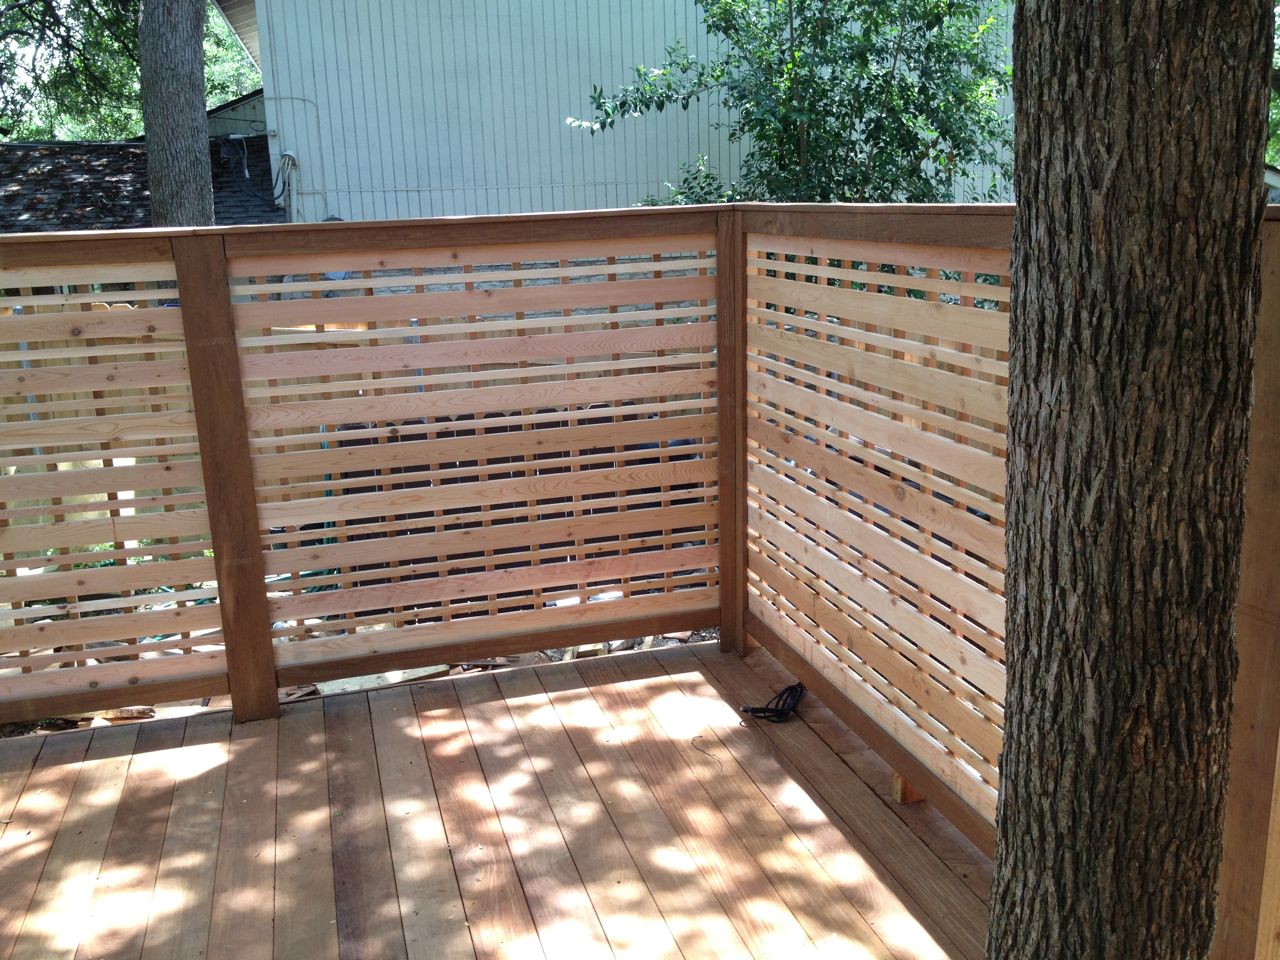
Contrast of Raw and Painted Screen

One Panel Painted
While building and installing the deck screen, we had not decided
exactly what type and color of finsh to make it. After seing the deck
screens in their "raw" state, I really liked the contrasting light and
dark colors, so we went with a semi-transparent cedar stain that would
protect the wood but not change the color very much (Behr
Semi-transparent Weatherproofing Wood Stain, Cedar Naturaltone
No. 5533). Having to stain it after assembly made this a very tedious
job. Probably took 20 hours total to paint due to all the nooks and
crannies the assmebled lattice work had. Had we known the finish ahead
of time, it would have been a lot easier to stain it prior to assembly.
Final Results
Final Unpainted Result
Rear View
Corner Closeup
Final Painted Result
Side View