 Cassandra.org
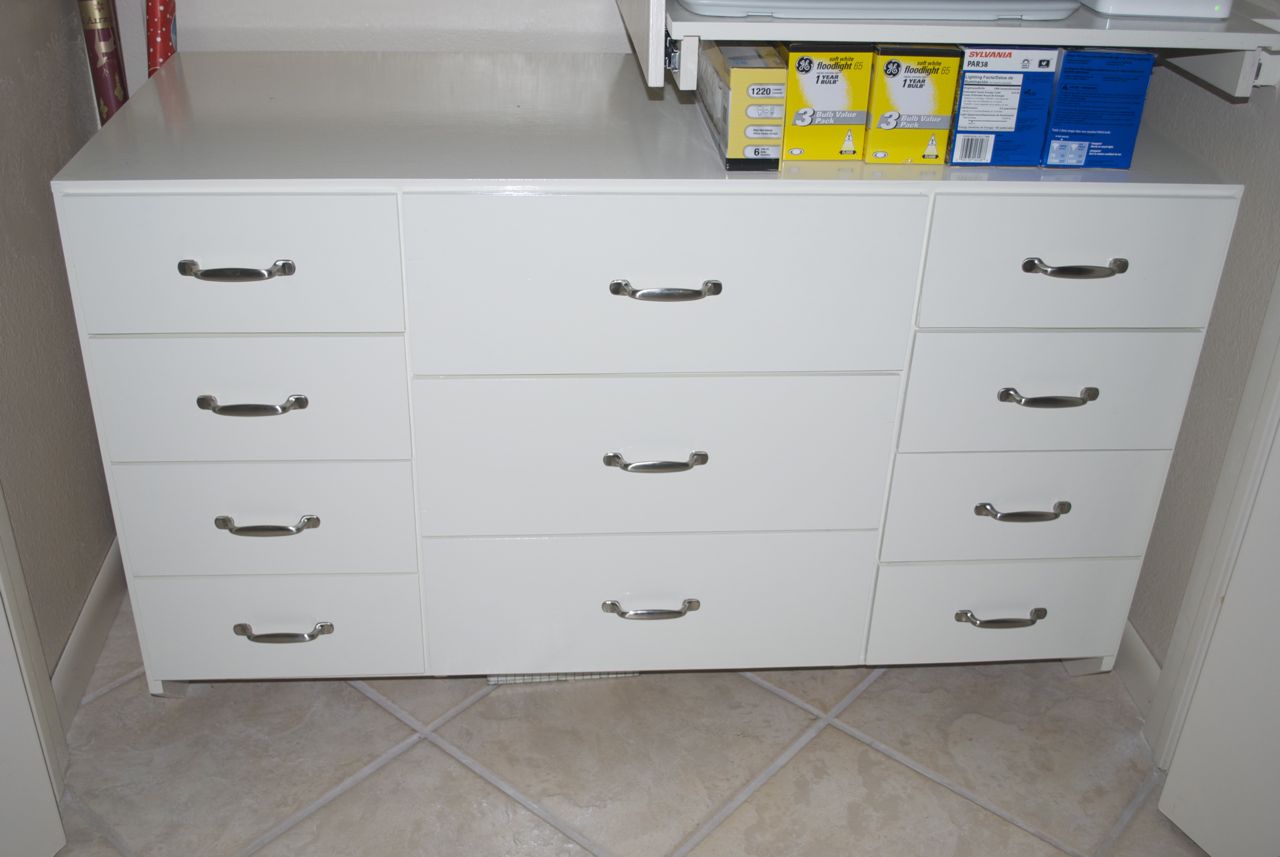
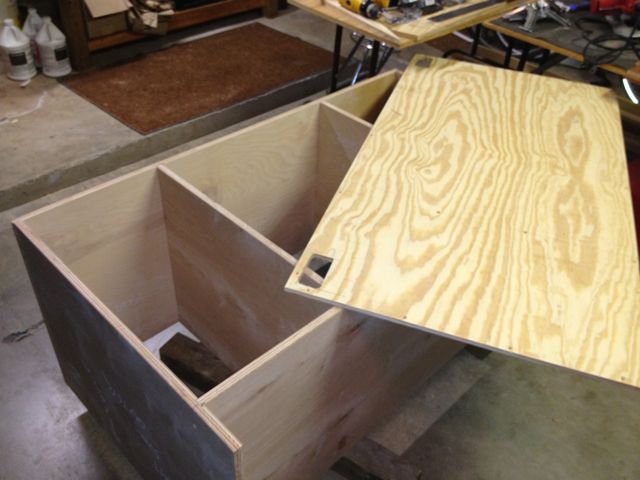
Final Cabinet in Closet
Specifications
Cabinet is mostly 3/4" nicely finished birch plywood. The drawers and the
cabinet back are 15/32" not-so-good plywood. Base coat of latex paint,
with a top coat of oil-based alkyd paint on the wearable surfaces of the
cabinet and drawers. Full extension drawer rails are used, rated for 100
lbs. each. Brushed nickel drawer handles.
Story
We had a mess of a closet that needed better organization. It was a
large closet, but designed to be a light-duty sewing closet and not an
industrial strenght junk storage area like we needed. The plan was to
redo this closet, which included redoing th8e shelves, and adding a
cabinet of drawers. As I was planning for the Server Closet Project, I
decided that a stand-alone cabinet with drawers would be simpler and
more versitile than a built-in cabinet which I otiginally envisioned.
The finishing steps (sand, paint, polyurethane) were to be done at the
same as the shelves of the closet (since they are the same finish), but
I was able to complete most of the construction work before I was able
to begin the clopset project per-se.
Miscellaneous Notes/Thoughts
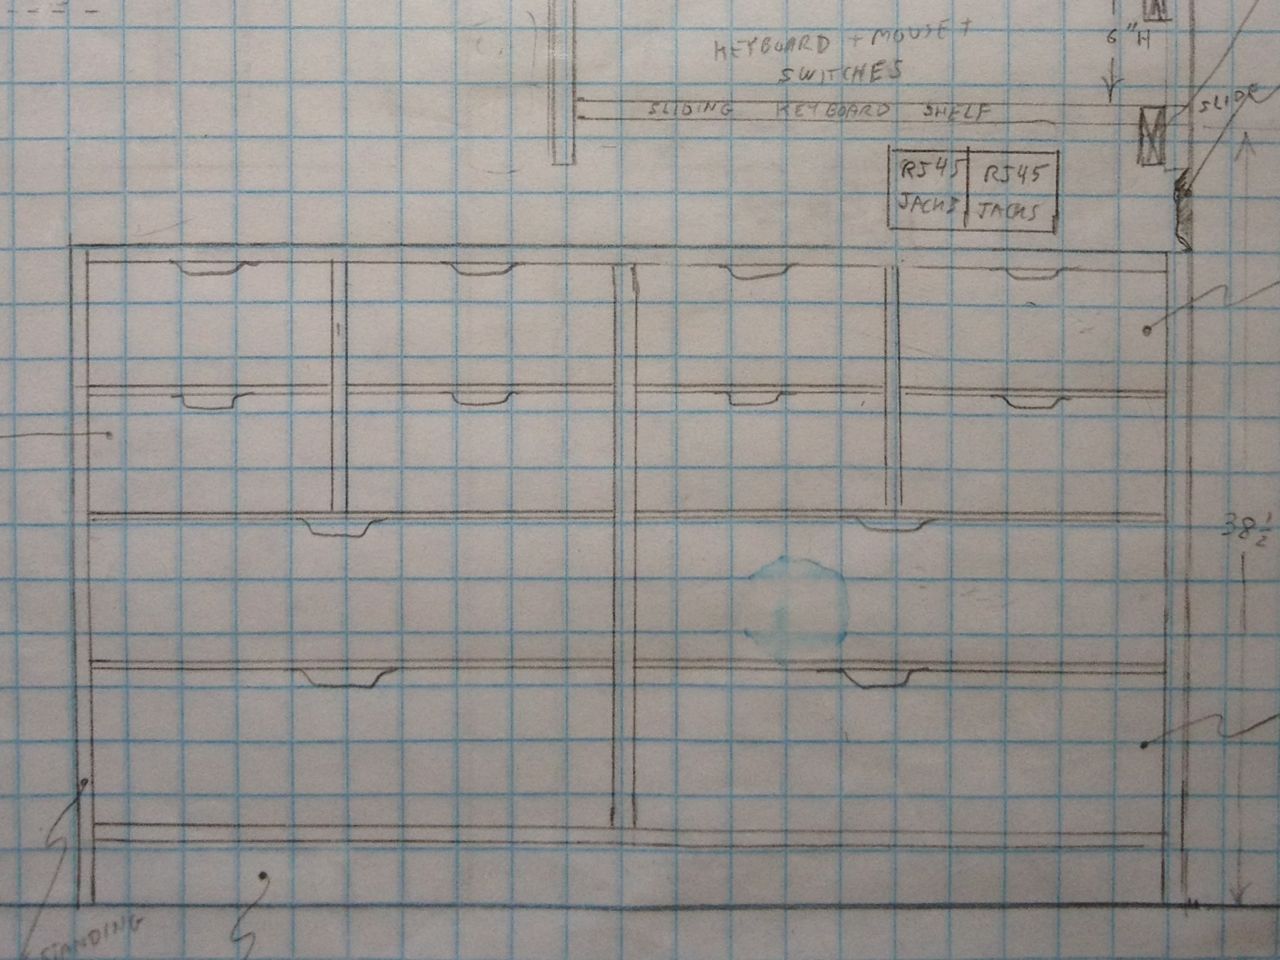
Original plans for cabinet drawer layout.
The exact layout of the drawers changes a few times. The picture at
right shows the original plan, but as I worked on the structure to
support this, I found it would be much easier to have just two vertical
supports. With the interleaving of the smaller and larger drawers, I
would also not run into issue where the screw holes from one column of
drawers would be interfering with the other.
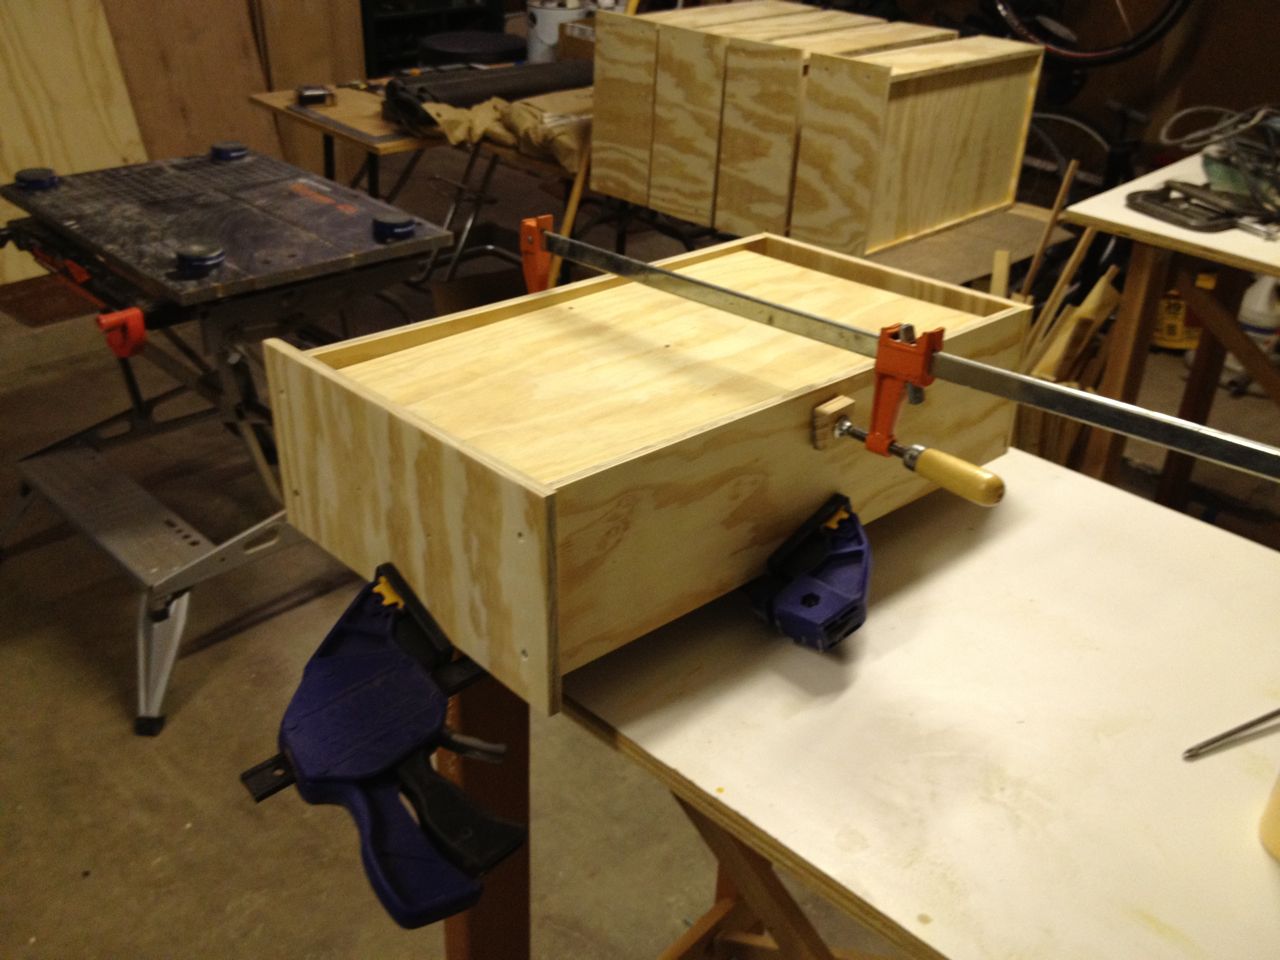
Close-up of drawer during assembly.

All drawer piece cuts finished.
I regret using the low-quality 15/32" plywood for the drawers. Too
many voids and warping issues. I figured that since I would be
painting the cabinet, the quality of the wood would not be so
important. However, because of my ample use of screws and glue, and the
fact thjat 15/32" thick drawers are likely overkill, I was able to make
this all work relatively well.

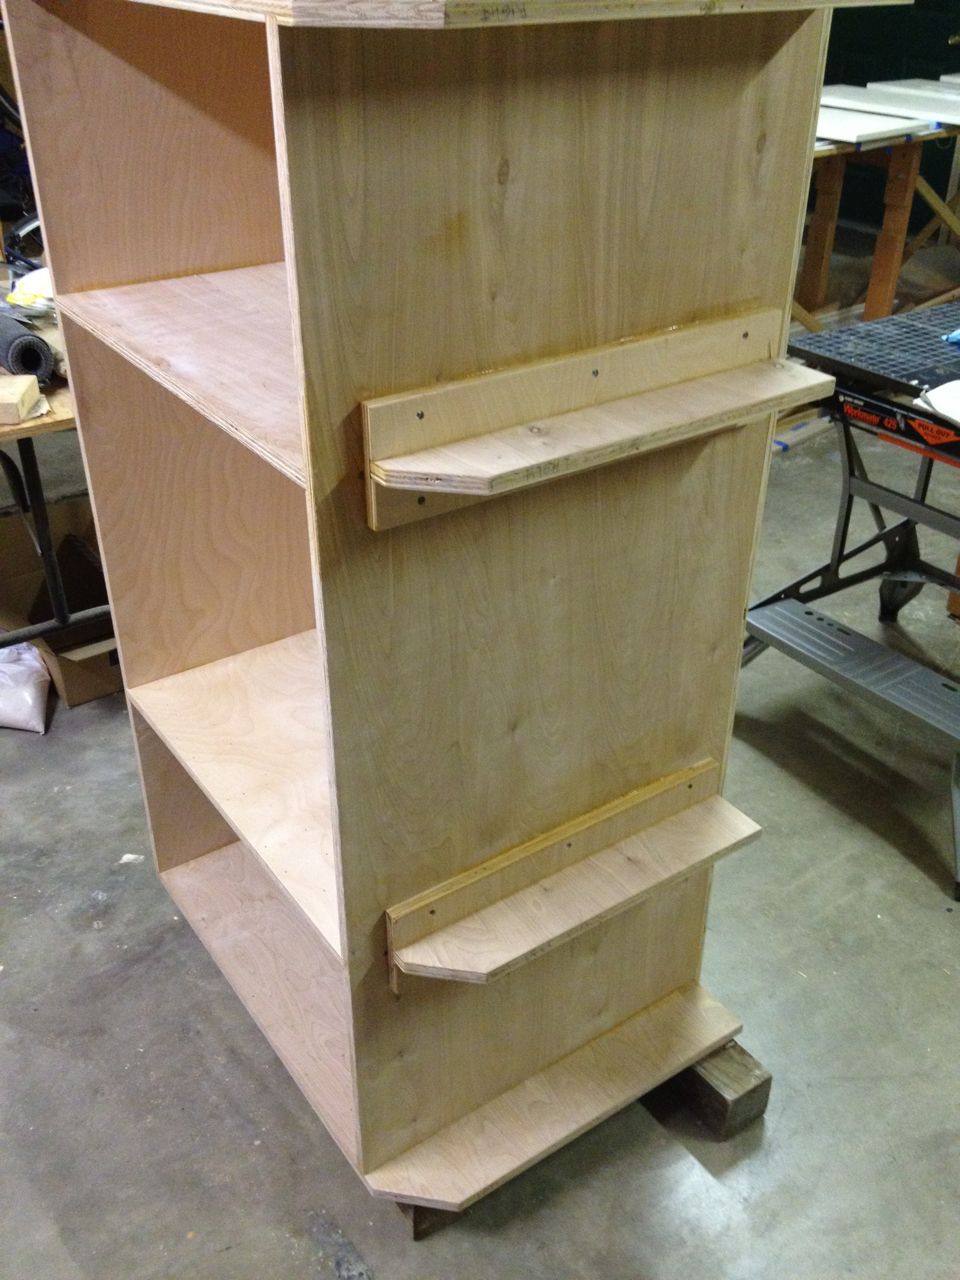
Rail installation during final assembly.
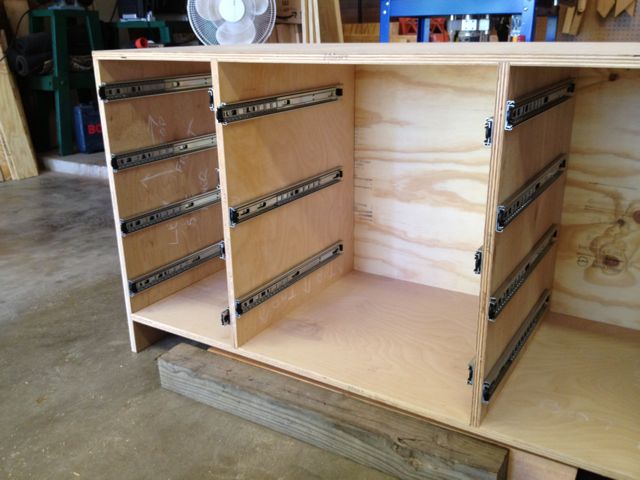
Rails installed during dry fitting.
Due to the nature of having sliding drawers on rails, I needed to hold
many of the tolerances very tightly. In all the previous woodworking
projects, this project contains the most precise measurement work I
have done so far. Measuring the crucial dimensions was done to the
1/32". More than 1/16" off and I would have a lot of problems, so I
overshot that with attempting 1/32" precision, since I knew there would
be lots of small errors even trying to do that.
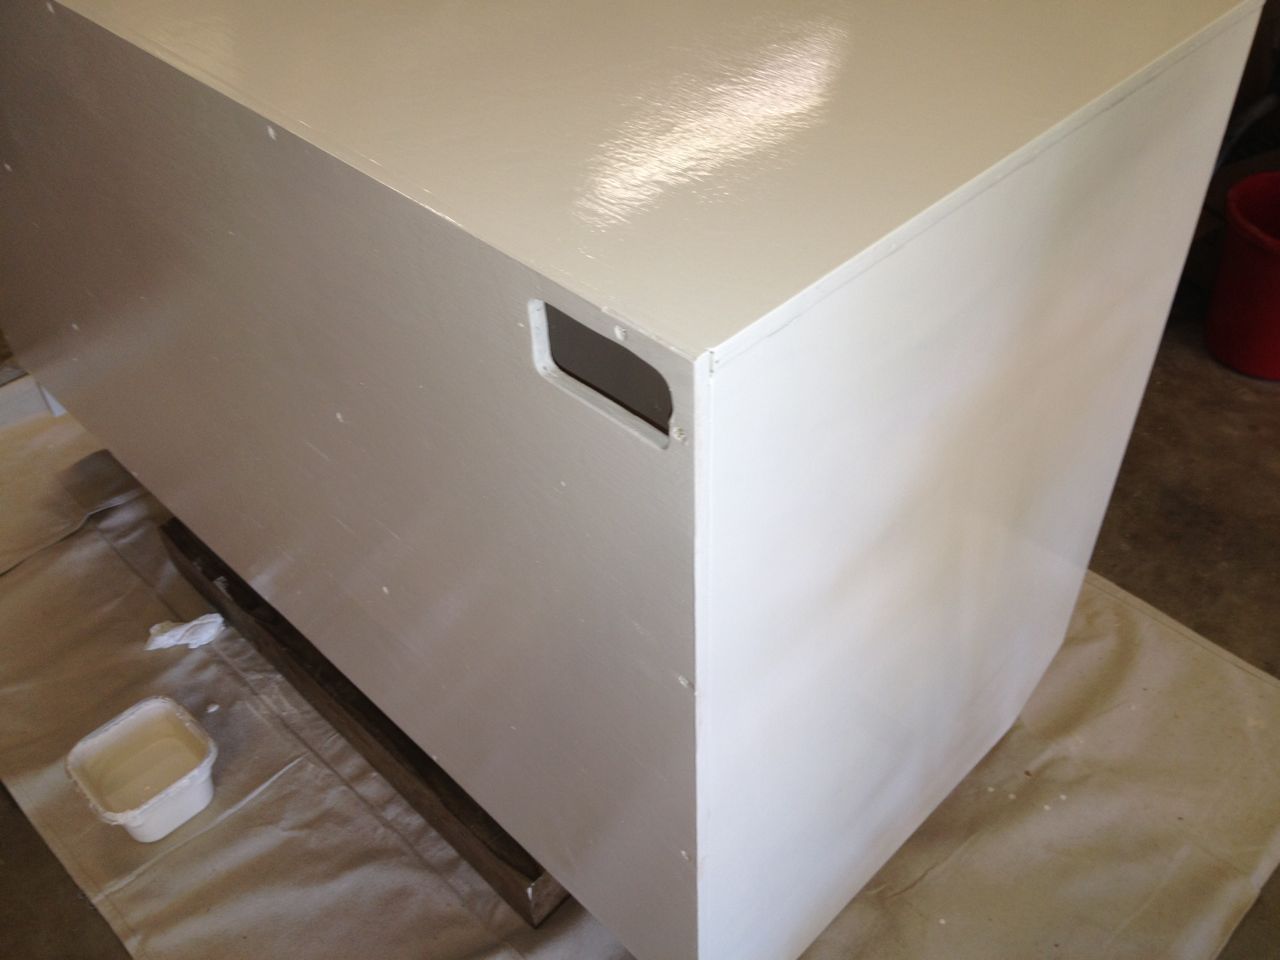
Closeup of carrying handle on finished cabinet.
Cabinet during dry assembly showing carrying handles.
This cabinet is very, very heavy. The cabinet shell itself is heavy,
and when you add in the 11 drawers and about 30 lbs. of rails, this
thing will not be moved easily. Because of this, and my experiences
moving heavy cabinets, I added and explict handle to the back side. If
you have every moved a cabinet before, you know that it is annoying
because you can get a good grip on the front by grabbing the top edge,
but the back has nothing and you have to usually bend down to grab it
from underneath. My simple handles solve this problem.

Drilling template for front cross-pieces (similar to those used for rail locations).
Drawers installed on rails during dry-fit.
Having successfully held the tolerances well enough so that the cabinet
compartment widths, rails and drawers all aligned perfectly, I then had
to make sure that the rails themselves where precisely installed. I
designed all the drawers to have only 1/8" clearance from one to the
other, so I could not be sloppy about locating the rails. With the
cabinet on the floor and assembled, it was a real pain-in-the-butt to
do the measurement on a single rail, much less 22 of them (11 pairs).
After doing two of them, I realized I was doing it wrong. I made a
template out of some thin particle board and was able to repeat the
exact locations more easily. I would use this same idea when it came
to adding the front cross pieces whose location required the same sort
of precision.
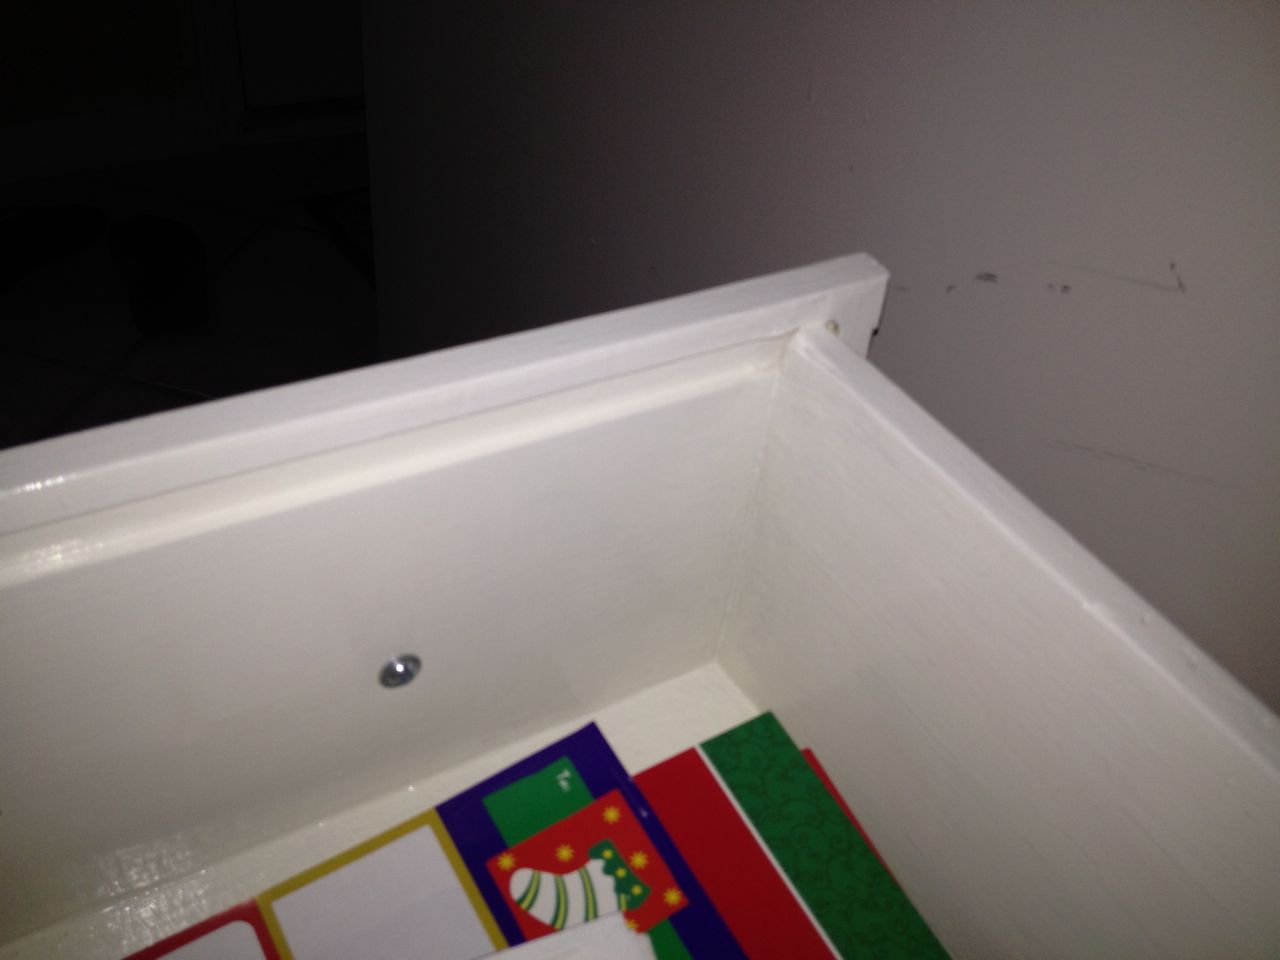
View of the mistaken dado groove.
There were only two real mental mistakes I made on this project. The
first was in making the drawer front's dado cut that would join to the
drawer bottom. The drawer sides and back have the dado cut about 3/16"
above the bottom of the side/back pieces, but since the drawer front
has to overhang outside the cabinet cavity by 1/4", the dado needed to
be 3/16" + 1/4" from the bottom of the front piece. I remember
mentally saying to myself to make sure I did not forget this when I set
up to cutr the sides and back, but I forgot to stop myself and went and
cut the fronts with the same set-up. Fortunately, this was on the
inside of the drawer, and I could flip the drawer over and re-cut it on
the other end. This leaves a channel on the inside top of the drawer
front which I can now say was designed to be a better way to grip the
drawer when pulling it out.
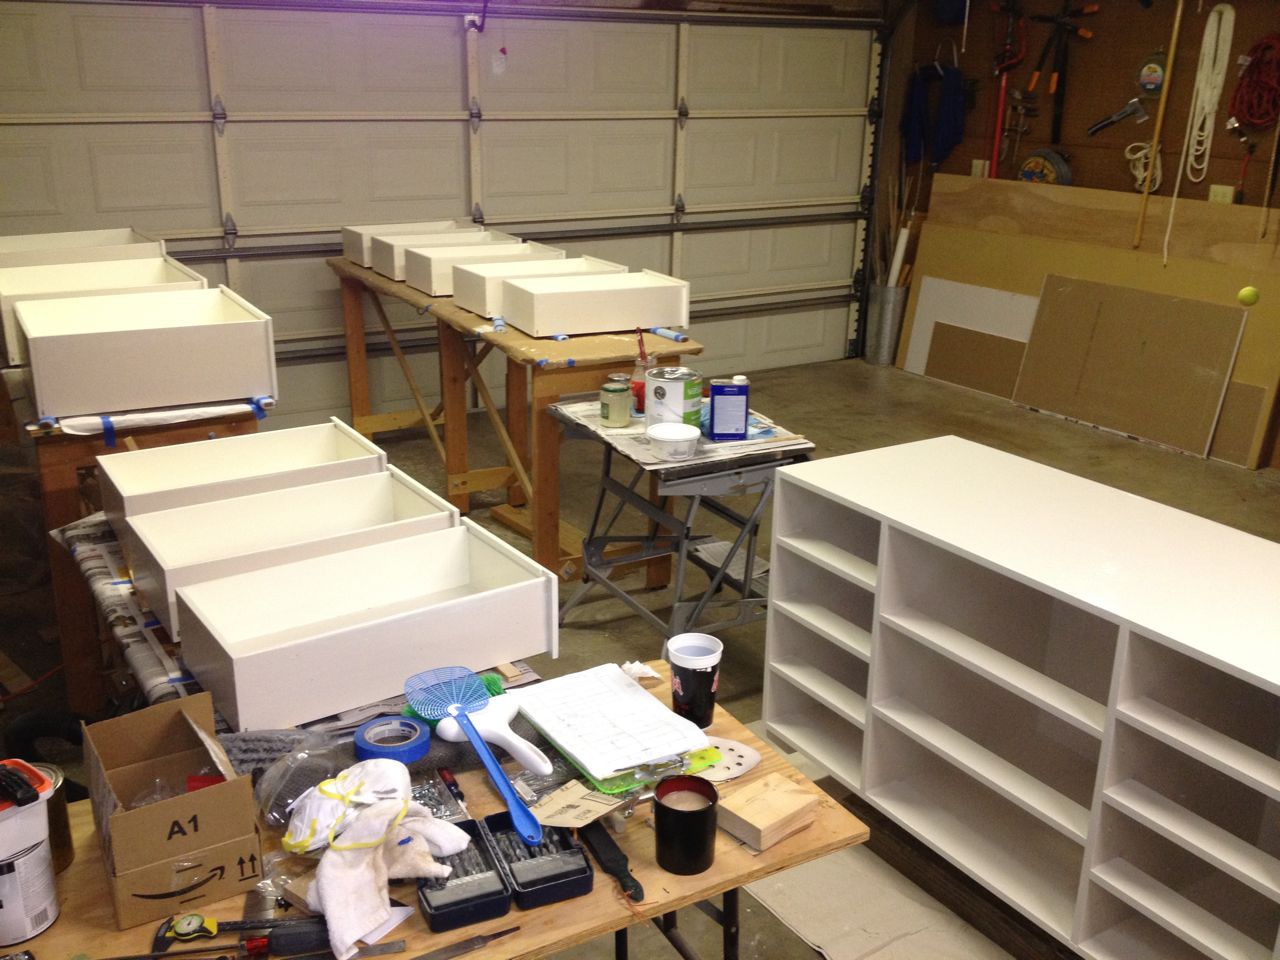
All parts after final, oil-based, alkyd painting.
I wanted a very durable surface for the cabinet and drawers, so opted
to use an oil-based, alkyd paint. This take a lot long to dry to the
touch, and to dry thoroughly, is harder to clean up and has much worse
fumes. That's the price for durability. Luckily, I was able to prime
the cabinet and drawers with a latex paint, so would only need to put
on one coat of the alkyd paint.
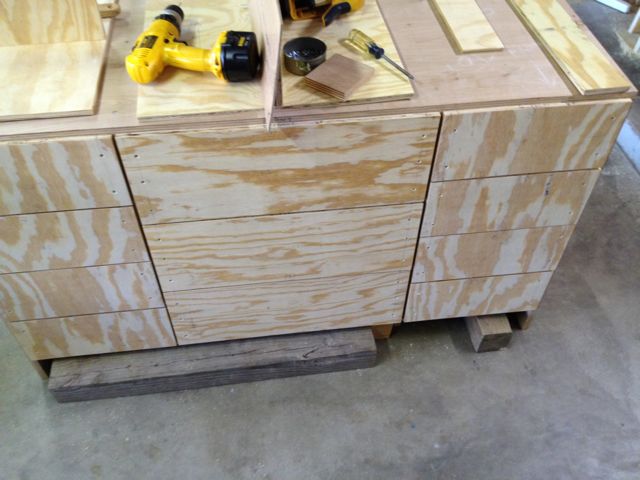
Underside of cabinet showing added "feet" and beveled edges.
I ran into two design problems during the dry-fit assembly that I
needed to solve. The first was the support structure. The original
plan had only the two sides touching the floor to support the entire
cabinet. While the 3/4" plywood was plenty strong to do this, there
was definitely some deflection that was occurring in the middle of the
cabinet when I first assembled it. Since I needed things aligned
precisely, and since the cabinet still needed to support the weight of
the drawers, rails and whatever contents where put into it, I felt it
was essential to add more to support it. I added a couple of "feet
directly under the the vertical drawer separators.
Note that I beveled the front edges of the four floor supports. Ever stub
your toe on a corner of a cabinet? Be beveling them, your feet can go
under the cabinet a few inches, and even if you shuffle side to side,
you will not hit your toes.
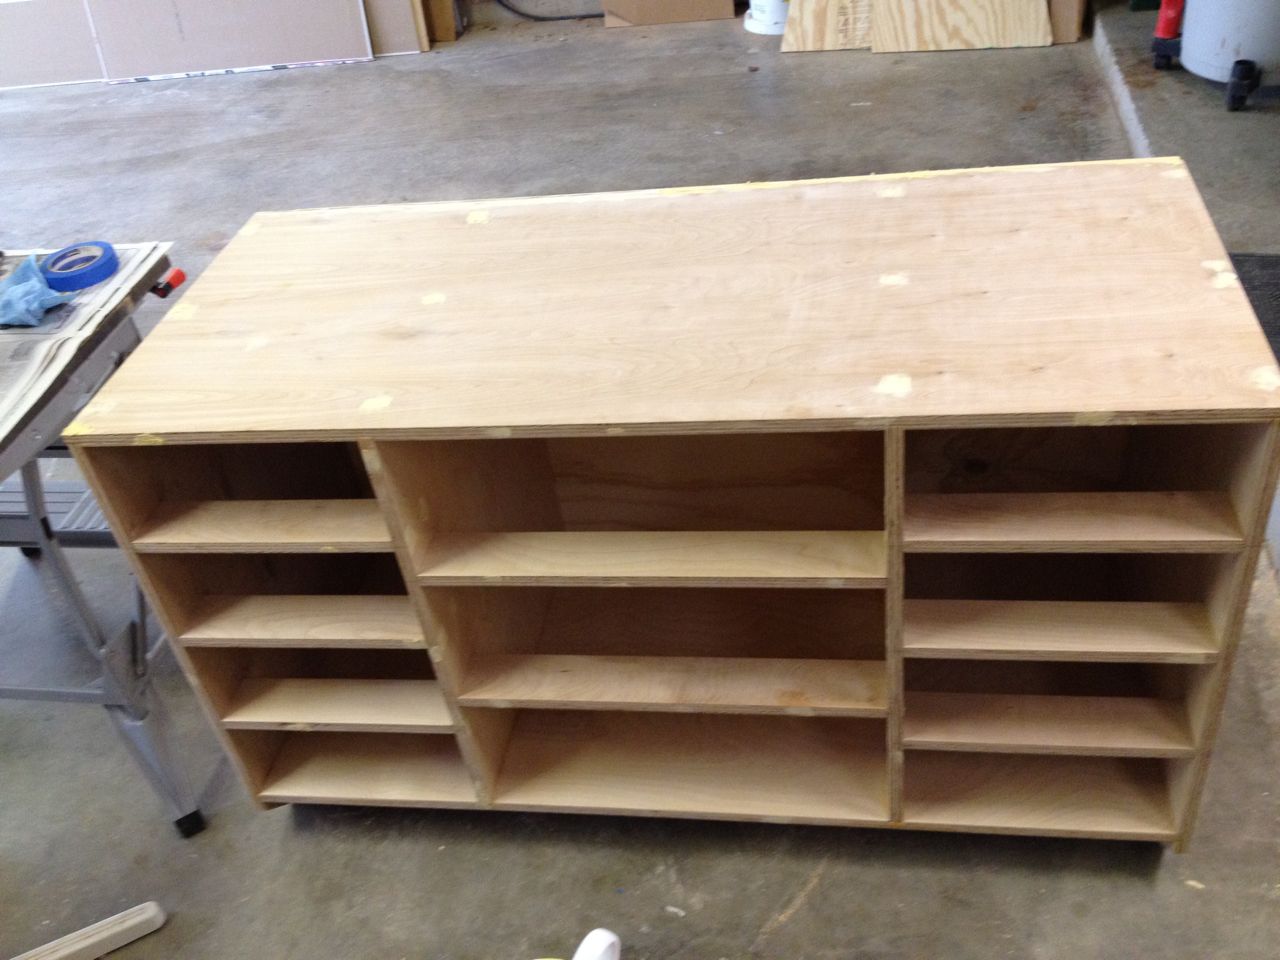
Cabinet just before painting with cross-supports installed.
The other design change was the addition of some front
cross-supports between the drawers. Two factors made these desired.
- When dry assembled (without all the screws and no glue) the front had a little wobble to it. I was sure it would be more rigid once final assmebled, but some extra support in front would be better, especial-ly if the drawers get loaded down with heavy objects and you have multiple drawers open.
- The cross supports would act to fill the 1/4" void between the drawer fronts. Without them, you would be peering into the drawer when looking between the top of one drawer and the bottom of the other. The cross supports would give the illusion of asolid, flat front when all drawers were closed.
These cross supports wound up being a major risk in the project. Though
I cut their widths precisely while I had the cabinet dry-fitted, I did
not drill the holes to locate them when it was assembled. For one reason
or another, I then dismantled the cabinet, so I would have to install
these for the first time after the cabinets assembly, but before the
drawer assembly. I would not find out if I got their locations right
until the very end of the project, since the drawers and cabinet rails
would not be installed until after painting. Because of this risk, I
decided to only use screws and no glue when installing them. I measured
and measured and measured to make sure I got it right, and in the end I
got it right.
View of the mistaken dado groove.
There were only two real mental mistakes I made on this project. The
first was in making the drawer front's dado cut that would join to the
drawer bottom. The drawer sides and back have the dado cut about 3/16"
above the bottom of the side/back pieces, but since the drawer front
has to overhang outside the cabinet cavity by 1/4", the dado needed to
be 3/16" + 1/4" from the bottom of the front piece. I remember
mentally saying to myself to make sure I did not forget this when I set
up to cutr the sides and back, but I forgot to stop myself and went and
cut the fronts with the same set-up. Fortunately, this was on the
inside of the drawer, and I could flip the drawer over and re-cut it on
the other end. This leaves a channel on the inside top of the drawer
front which I can now say was designed to be a better way to grip the
drawer when pulling it out.
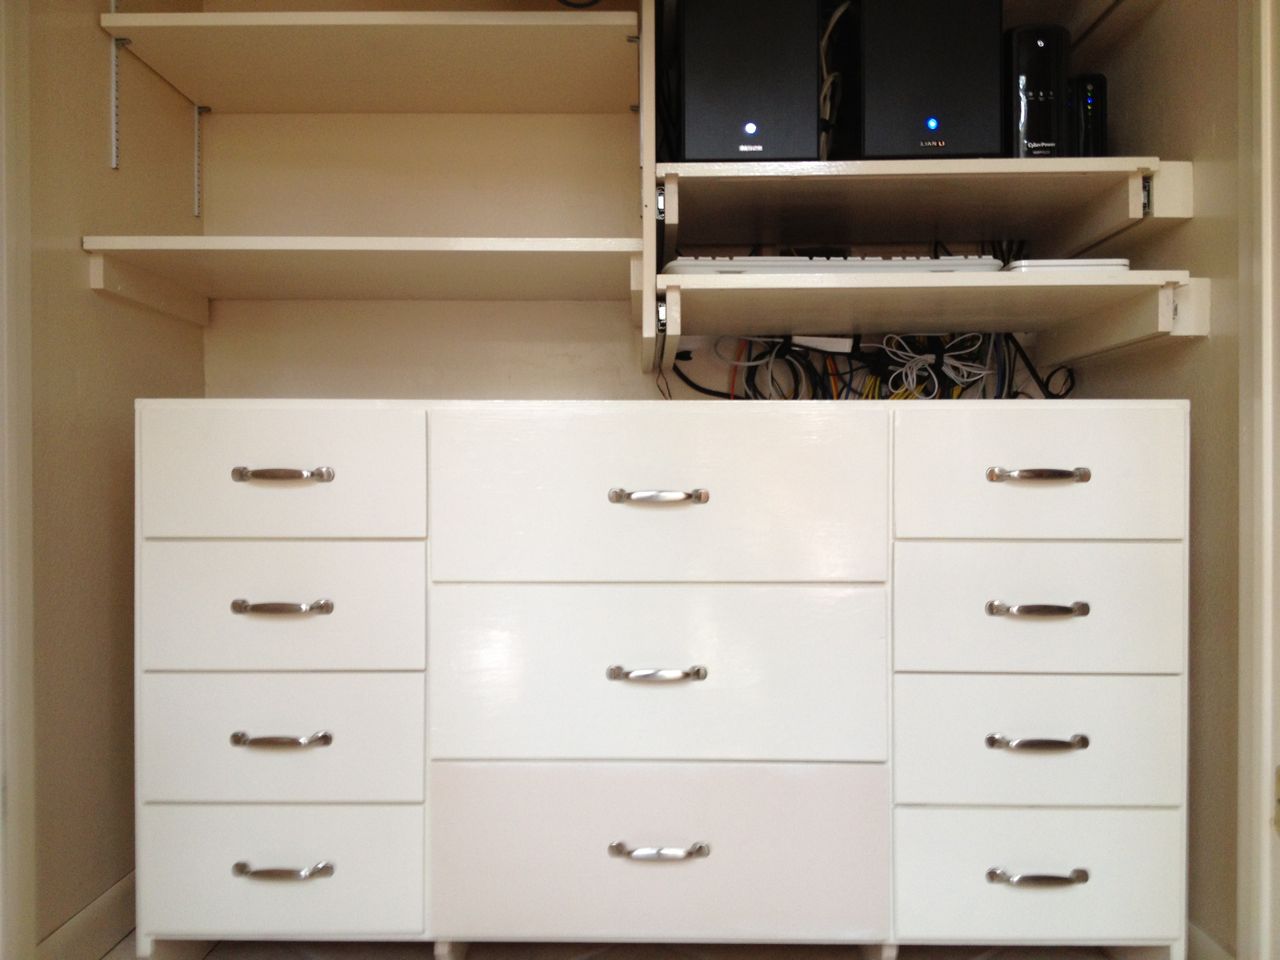
One drawer missing final paint.
The other mistake was more minor, and easily correctable, but it
occurred at the very moment at the end, where the project culminates
into the final product. I had forgotten to paint one of the drawer
front with the final, oil-based alyd paint.