Cassandra.org
Computer Model Rendering
Pattern (Rev. A)

All Windows (Rendering)
Story
One of the trademarks of Frank Loyyd Wright's designss was his use of
leaded stained glass in many of his house designs. These were mostly clear
class with geometric patterns and sparing use of colors in the designs. He
preferred to call these "light screens" since they they were about 80%
clear clear that allowed you to see out, but also offered more of a visual
barrier that a regular window to give the rooms a more private feel. It is
a very neat idea which I always thought would be really cool to have if you
could afford it.
As I was researching replacement windows for our home, I wandered
around looking to see if anyone made such things and found that the
Andersen Window company offers "Art Glass" inserts for windows, and they
even have 4 different patterns based on Frank Lloyd Wright's designs. Of
course, nowhere could I find what they charge for these things, but I
eventually got some help and found out that they were in the neighborhood
of $1,600 each. We were installing 9 new windows, which would translate
into a lot of money to reproduce this effect. It was too hard to justify
spending that much for something that is very far from a necessity. Also,
of the 4 patterns they had, we were not really very keen on any of them.
Eventually the thought occurred to me that maybe we could make these
art glass window inserts ourselves. I started researching how to make
leaded stained glass and eventually took and introductory course at a local
store. This was all done to see what the feasibility might be for doing
this.
Naturally, in the introductory course they have you make a very small
panel, so aside from learning the basics, I was keen to understand what
happens when you make something much larger and need to make them in
quantity. The windows they would be installed in are 2 ft by 6 ft and I
would initially need 6 or 9 depending on how many rooms I wanted to use it
in.
As of this writing (Feb. 2011), I am still in the intro course and just
starting to think about the pattern. We'll likely make one window first as
a prototype and see where that goes.
First Candidate Design
Straightened Image

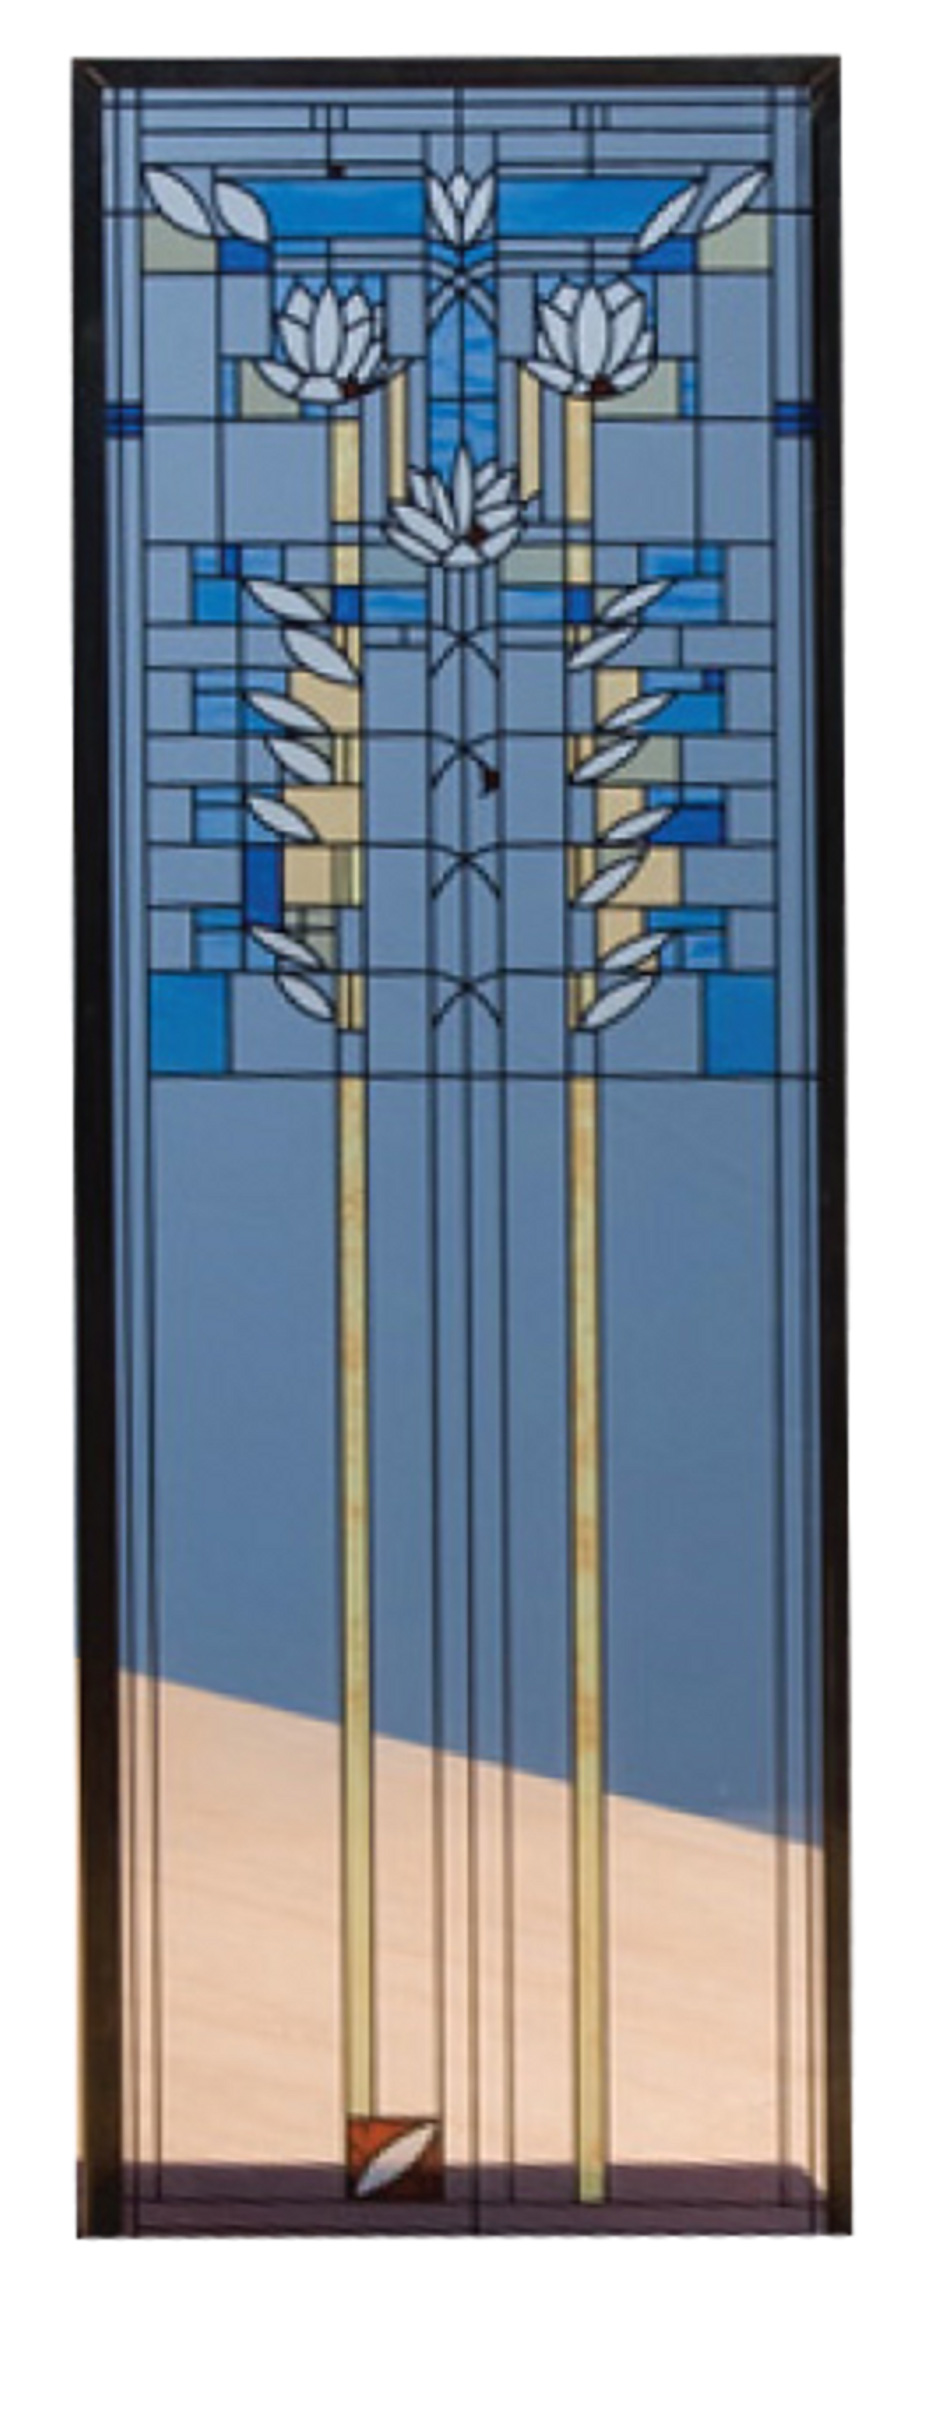
Product Image
I have lots of books on Frank Lloyd Wright's work, and also bought a
few more that focused on his stained glass work. After reviewing all of
the patterns, we narrowed it down to a few. However, I also added to this
a lot of web-based research and I ran across a design that we liked the
most of all. This design I believe is called "waterlillies" and as far as I
could tell from the spare information I could dig up, it was never actually
built, but just a sketch from older plans circa 1895 or so. You can buy a
miniature version of this from some stores, including amazon, though it
stands only 11 inches tall or so.
It was photos of this miniature that was all I had to go by. At right is
the best photo I could find of this product.
If I wanted to make this window, I would need to turn this into a
pattern that would match the dimensions of the windows. To do this, I was
going to use the free, but powerful 3D modeling program "Blender". I would do this by using this
image as a reference background and add model elements in the same
proportions. However, the image I had was a an angled perspective view, so
I used a trick from the image manipulation world of shearing the image via
a persepctive free, but powerful image manipulation software "Gimp". The "straightened" image came out
nicely, and I would use this to base the 3D model on.
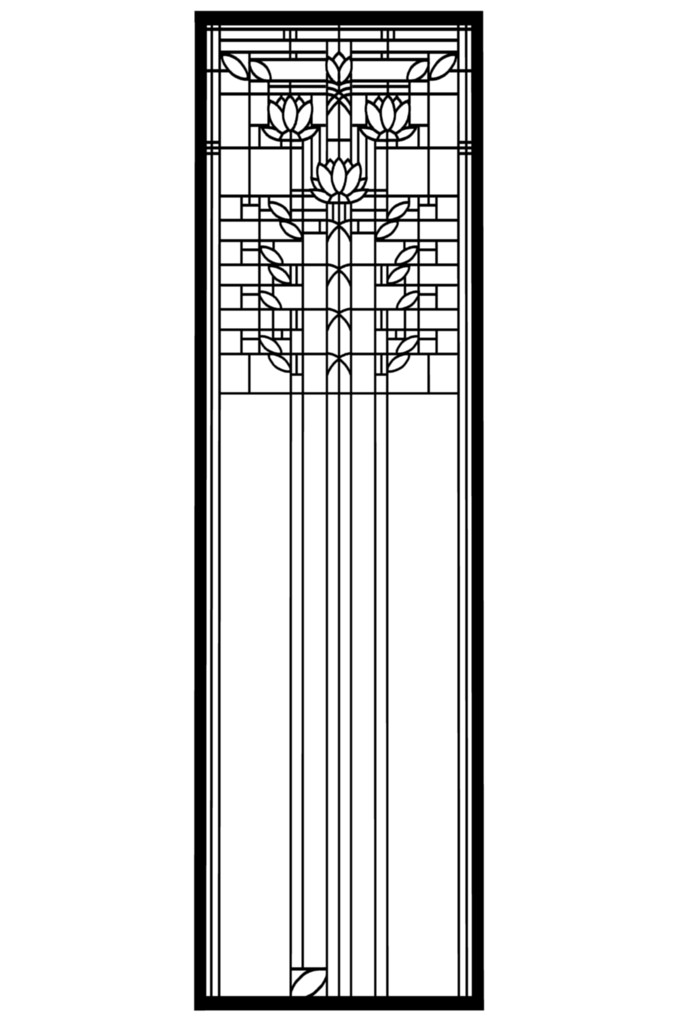
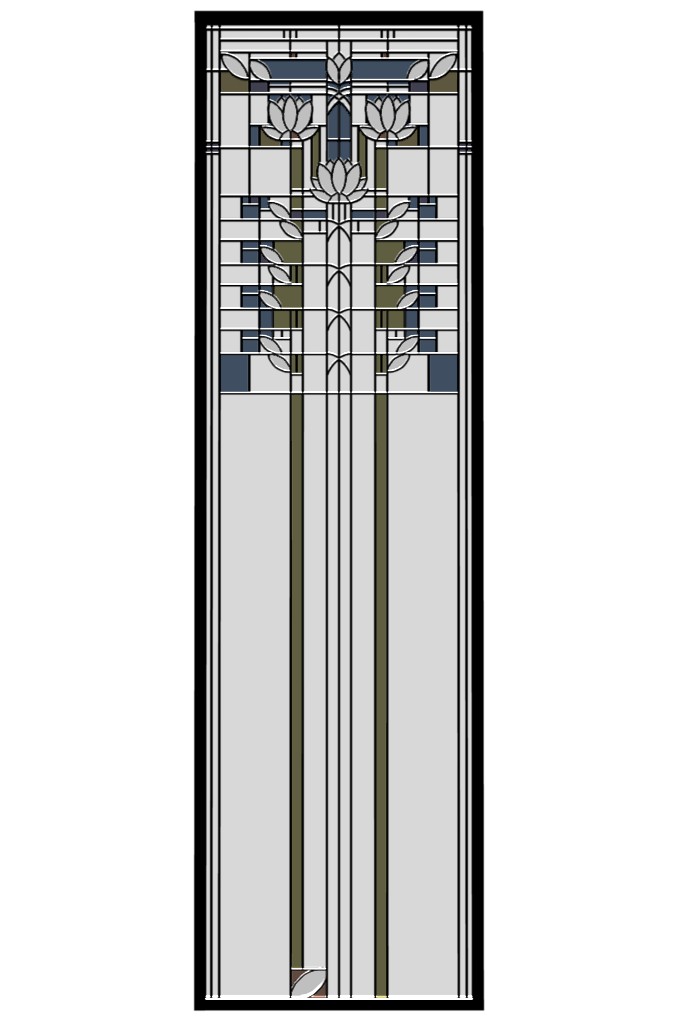
Monochrome Pattern
Pattern w/coloring

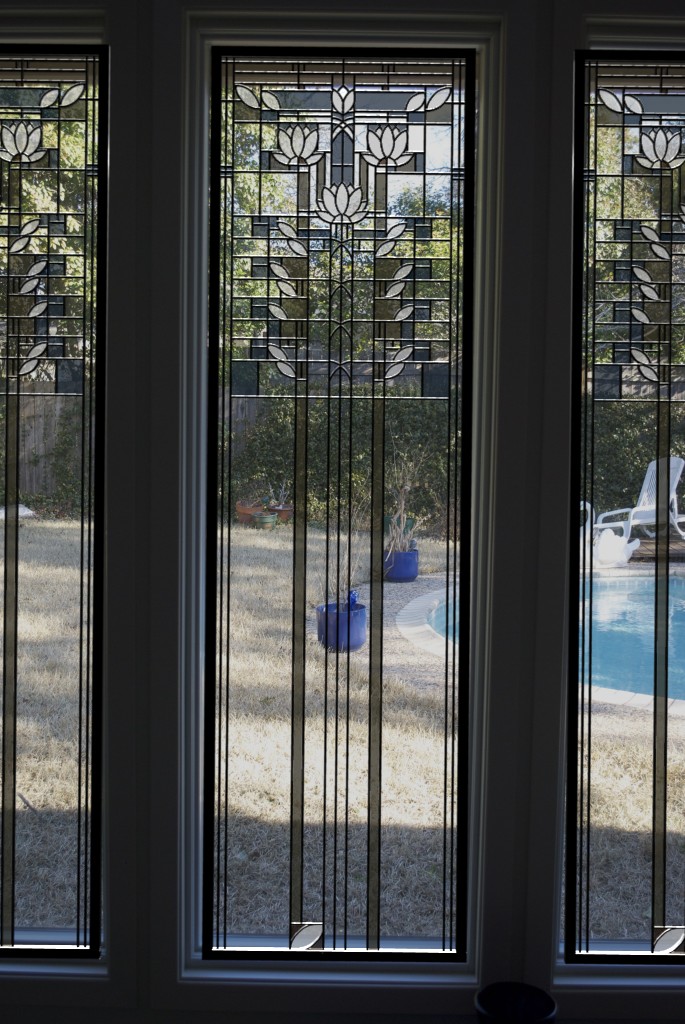
Pattern Closeup
Trying to model stained glass in software for the first time was a bit
tricky and I definitely did not get the colors right, but overall, the
first attempted worked well enough to give me the basis for making the
pattern I would need. See the final results of the first design attempt at
right. The monochrome pattern is similar to the pattern/cartoon that we
will need when we make the window, only it'll need to be blown up to be 2
ft by 6 ft (I am hoping Kinko's can do this for us). It's tricky business
to define the properties of stained glass: color, reflectivity,
transparency, refraction, specularities, etc.
I will likely need to change the pattern a little. Stained glass
windows this size need re-inforcement in the way of bars going
horizonatlly. This has to be worked itno the design so that it loks
visually pleasing.
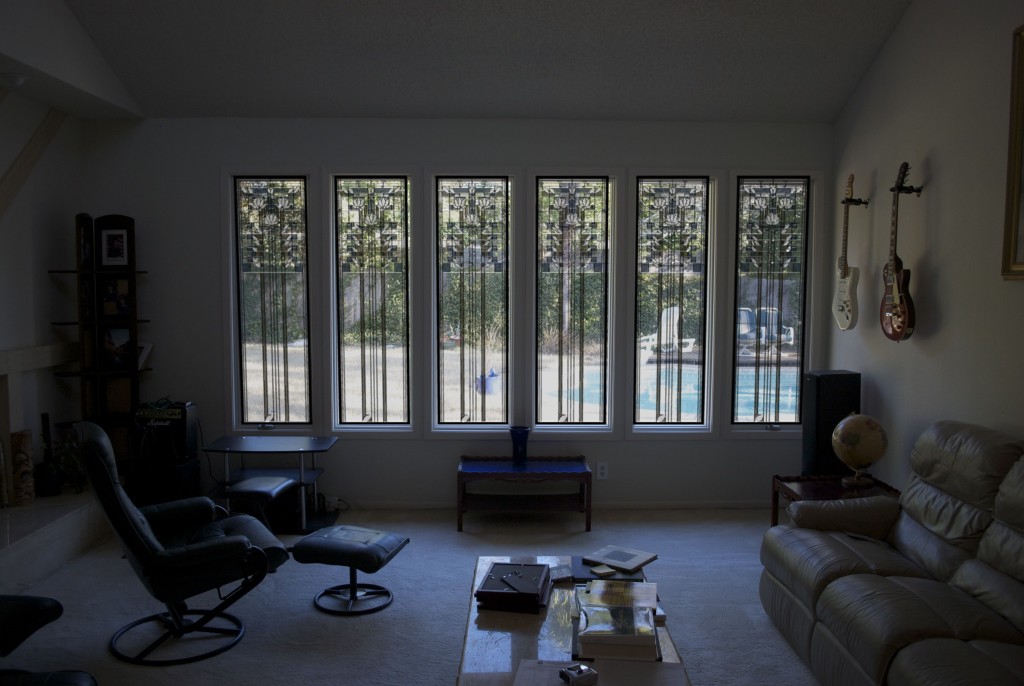
Once you have a 3D model, you can do some fancy things such as
"simulate" what it might look like by rendering it from a virtual camera's
perspective. I did this by taking a picture of the existing living room
windows, remebering exactly where the camera was when I took it,
replicating the window design in the software to get 6 copies, then
modeling the locations of them to match the actual living room layout.
Adding a few light sources in the modeling software at strategic spots, and
setting the virtual camera to the position of where I took the picture, I
then generated a perspective picture of the windows with the actual photo
in the background. This requires some iterations of refinements of the
positions and rotations of things to get them to match up (near) exactly,
but the end result gives a very good simulation of how it might look. If
you look close enough you can see the slight mismatch of the borders of the
windows.
Simulated Model Views